Two things will cover the top frame: twelve months and thirteen constellations. The months will be marked and labelled on the outside of the top, while the constellation begin and end dates will be noted on the inside of the top. The constellations will be represented across the to of each dodecagon section.
Each section of the dodecagonal frame is 2 7/16" long on the outside edge for a total of 29 1/4". This leaves 0.0801" per day. The month markings vary, of course, but are always close to a corner. The 13 astronomical constellations vary widely in length from Scorpius, 6 days, to Virgo, 44 days.
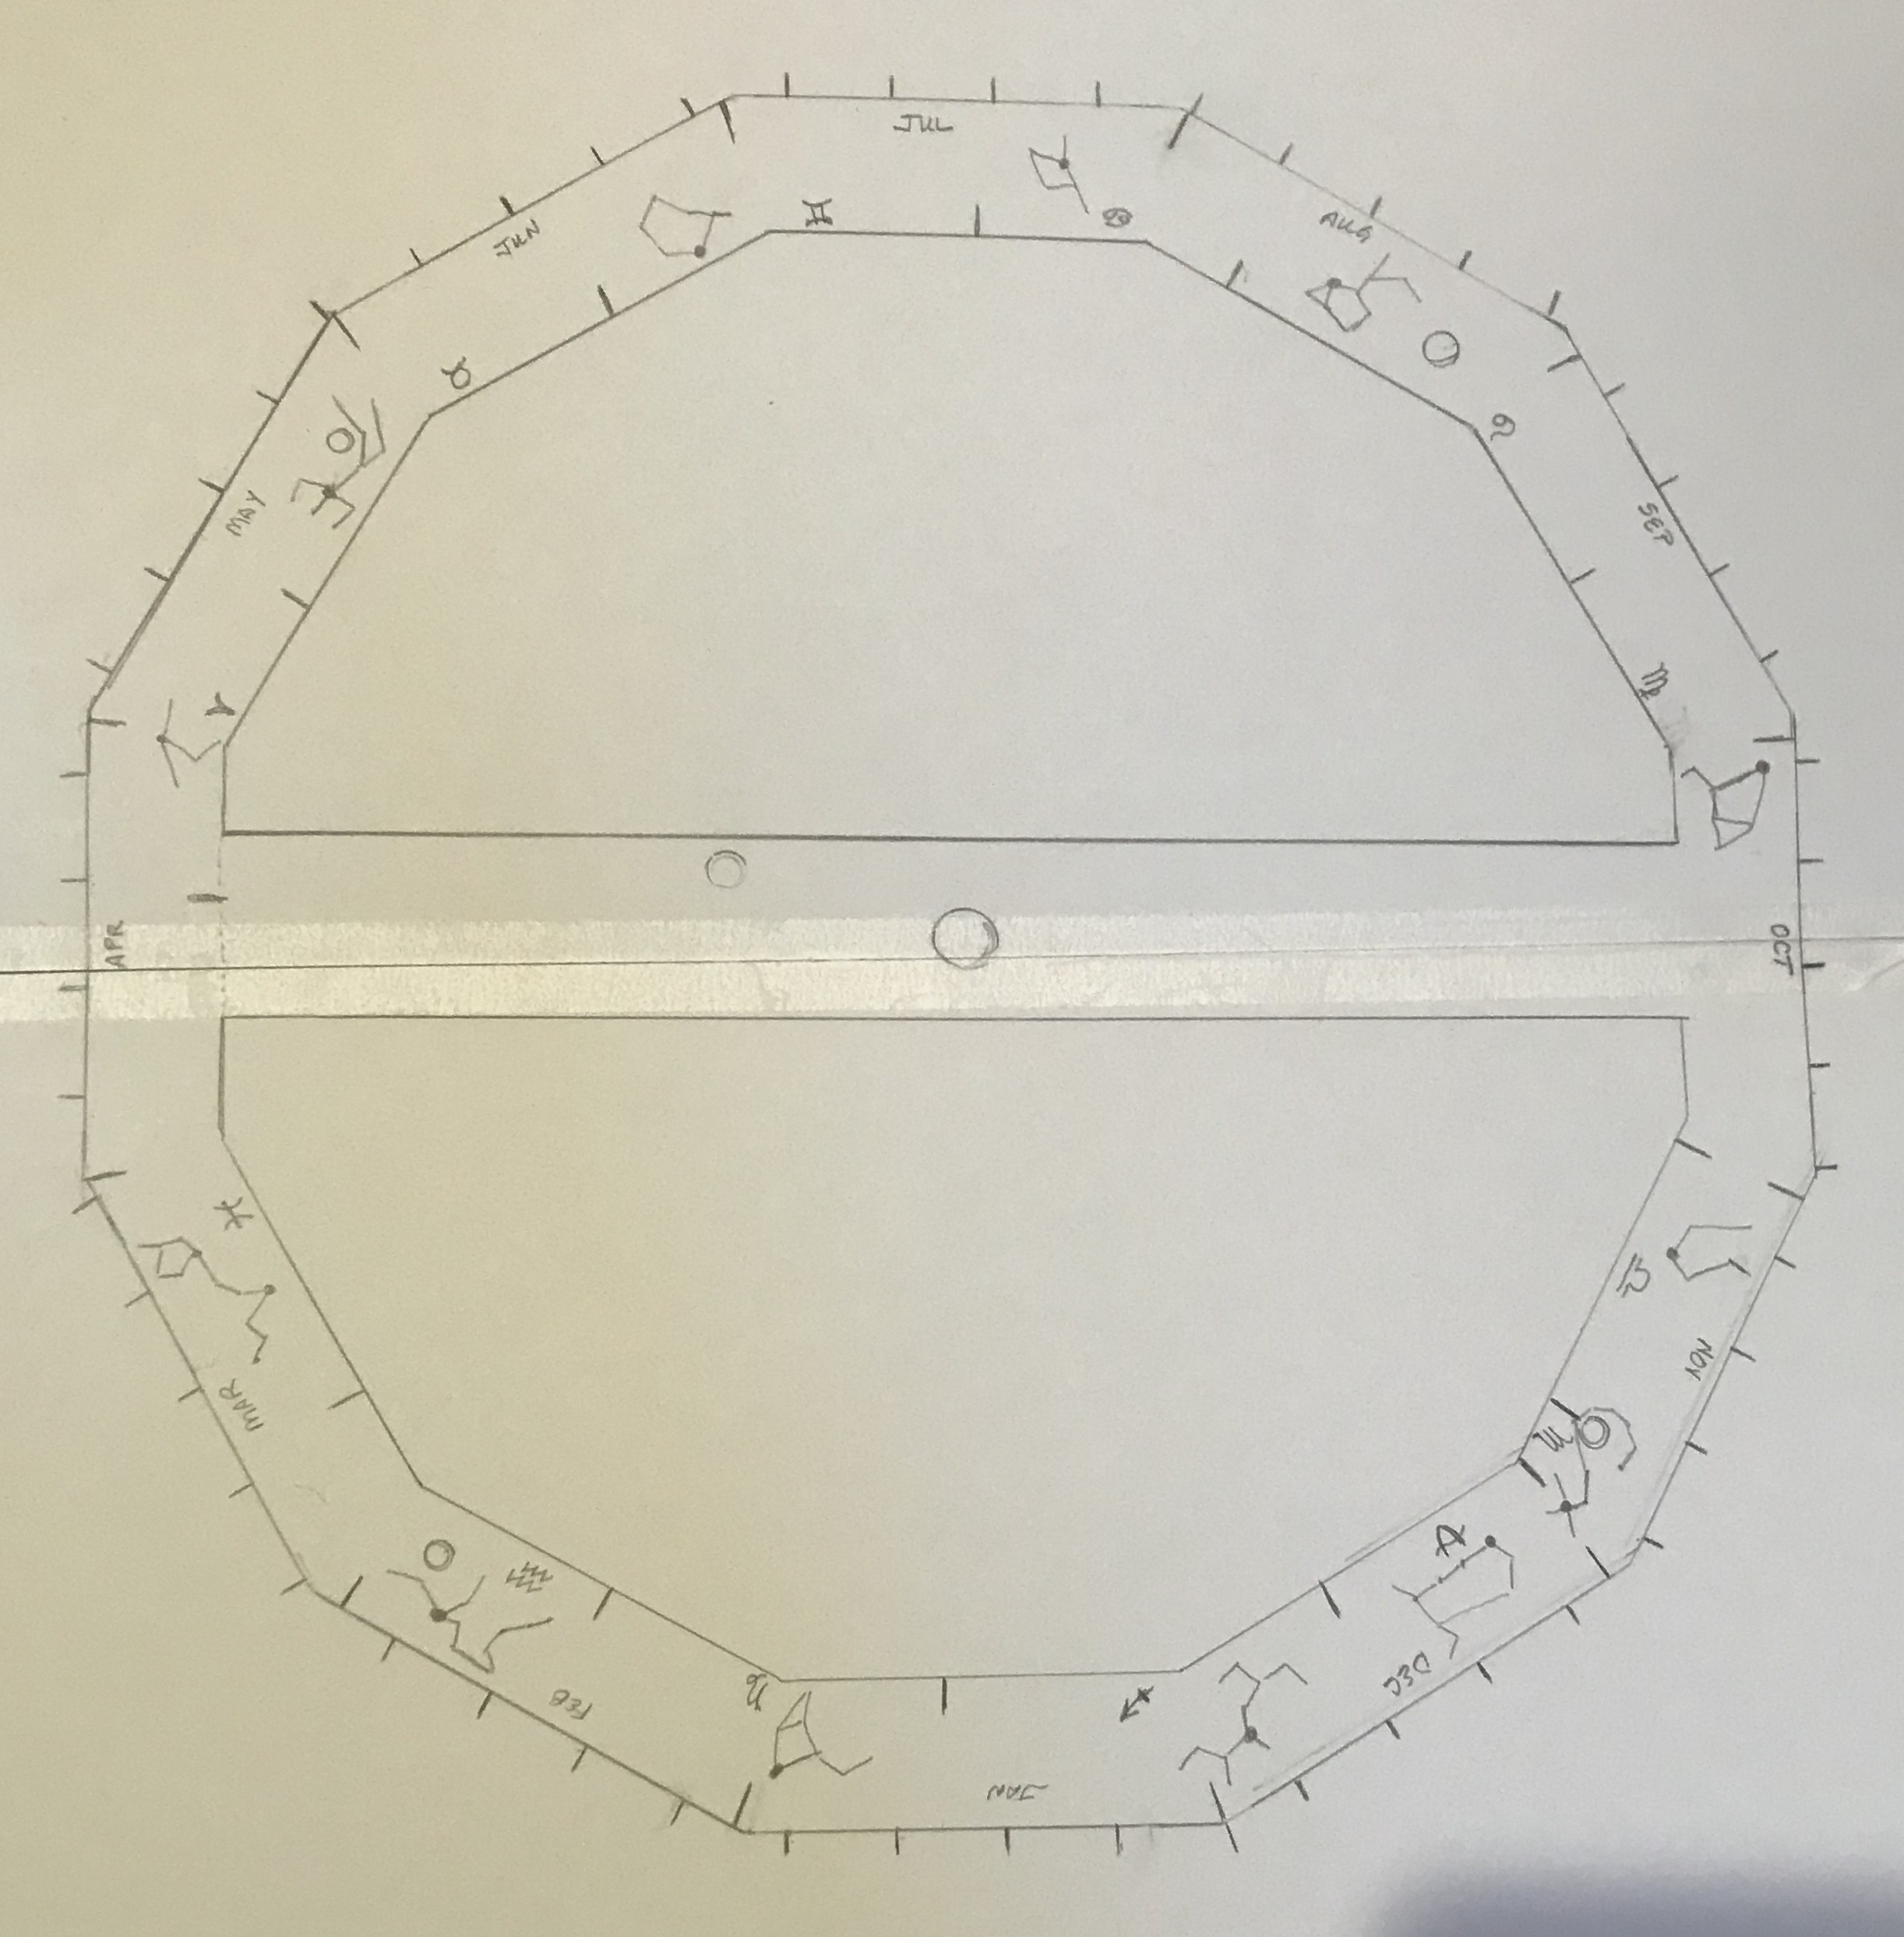
A template was made by taping two pieces of Bristol paper together and tracing the top frame onto these two sheets. The months were marked next, estimating where each starting day fell based on 0.0801" per day. Using the same estimating technique, the beginning of the constellations were marked as well. Finally the symbols for the constellations and schematics of the constellations were added. A picture of this template is shown below.
The plan is to somehow mark the month and constellation boundaries using some sort of scratching or milling device. The names of the months and constellation symbols will be engraved. The stars for the constellation diagrams will either be punched or drilled, while the lines between stars will be engraved. Each constellation diagram has at least one bright star and these need to be highlighted in some way. This might be a drop of paint or a "jewel" glued into place. Painting the frame deep blue followed by cutting the decorations through the paint is also a possibility. A variety of approaches will be tried on scrap pieces of brass after sanding to 1000 grit and polishing.
The 2" wide bottom gear support is quite heavy looking, so I decided to "lighten" it up with planets. Holes will be laid out on the the support end opposite the crank. This is about a 2" X 4" space. If the diameter of the top dodecagon (9.5") is set equal to the diameter of the sun, then the diameter of Jupiter is 0.98". Similarly, the diameters of the other planets are Saturn (0.83"), Uranus (0.35"), Neptune (0.34"), Earth (0.087"), Venus (0.083"), Mars (0.044"), and Mercury (0.035"). The diameter of Saturn's rings would be 2.5" beginning about 1/16" from Saturn's surface. These won't fit so will be extended to the edge of the support and past Jupiter, indicating their size without being explicit. The plan is to drill/bore holes for each of the planets in a spiral with Saturn and its rings at the outermost end of the support. The rings of Saturn would be indicated with a number of concentric circles formed with a fly cutter.

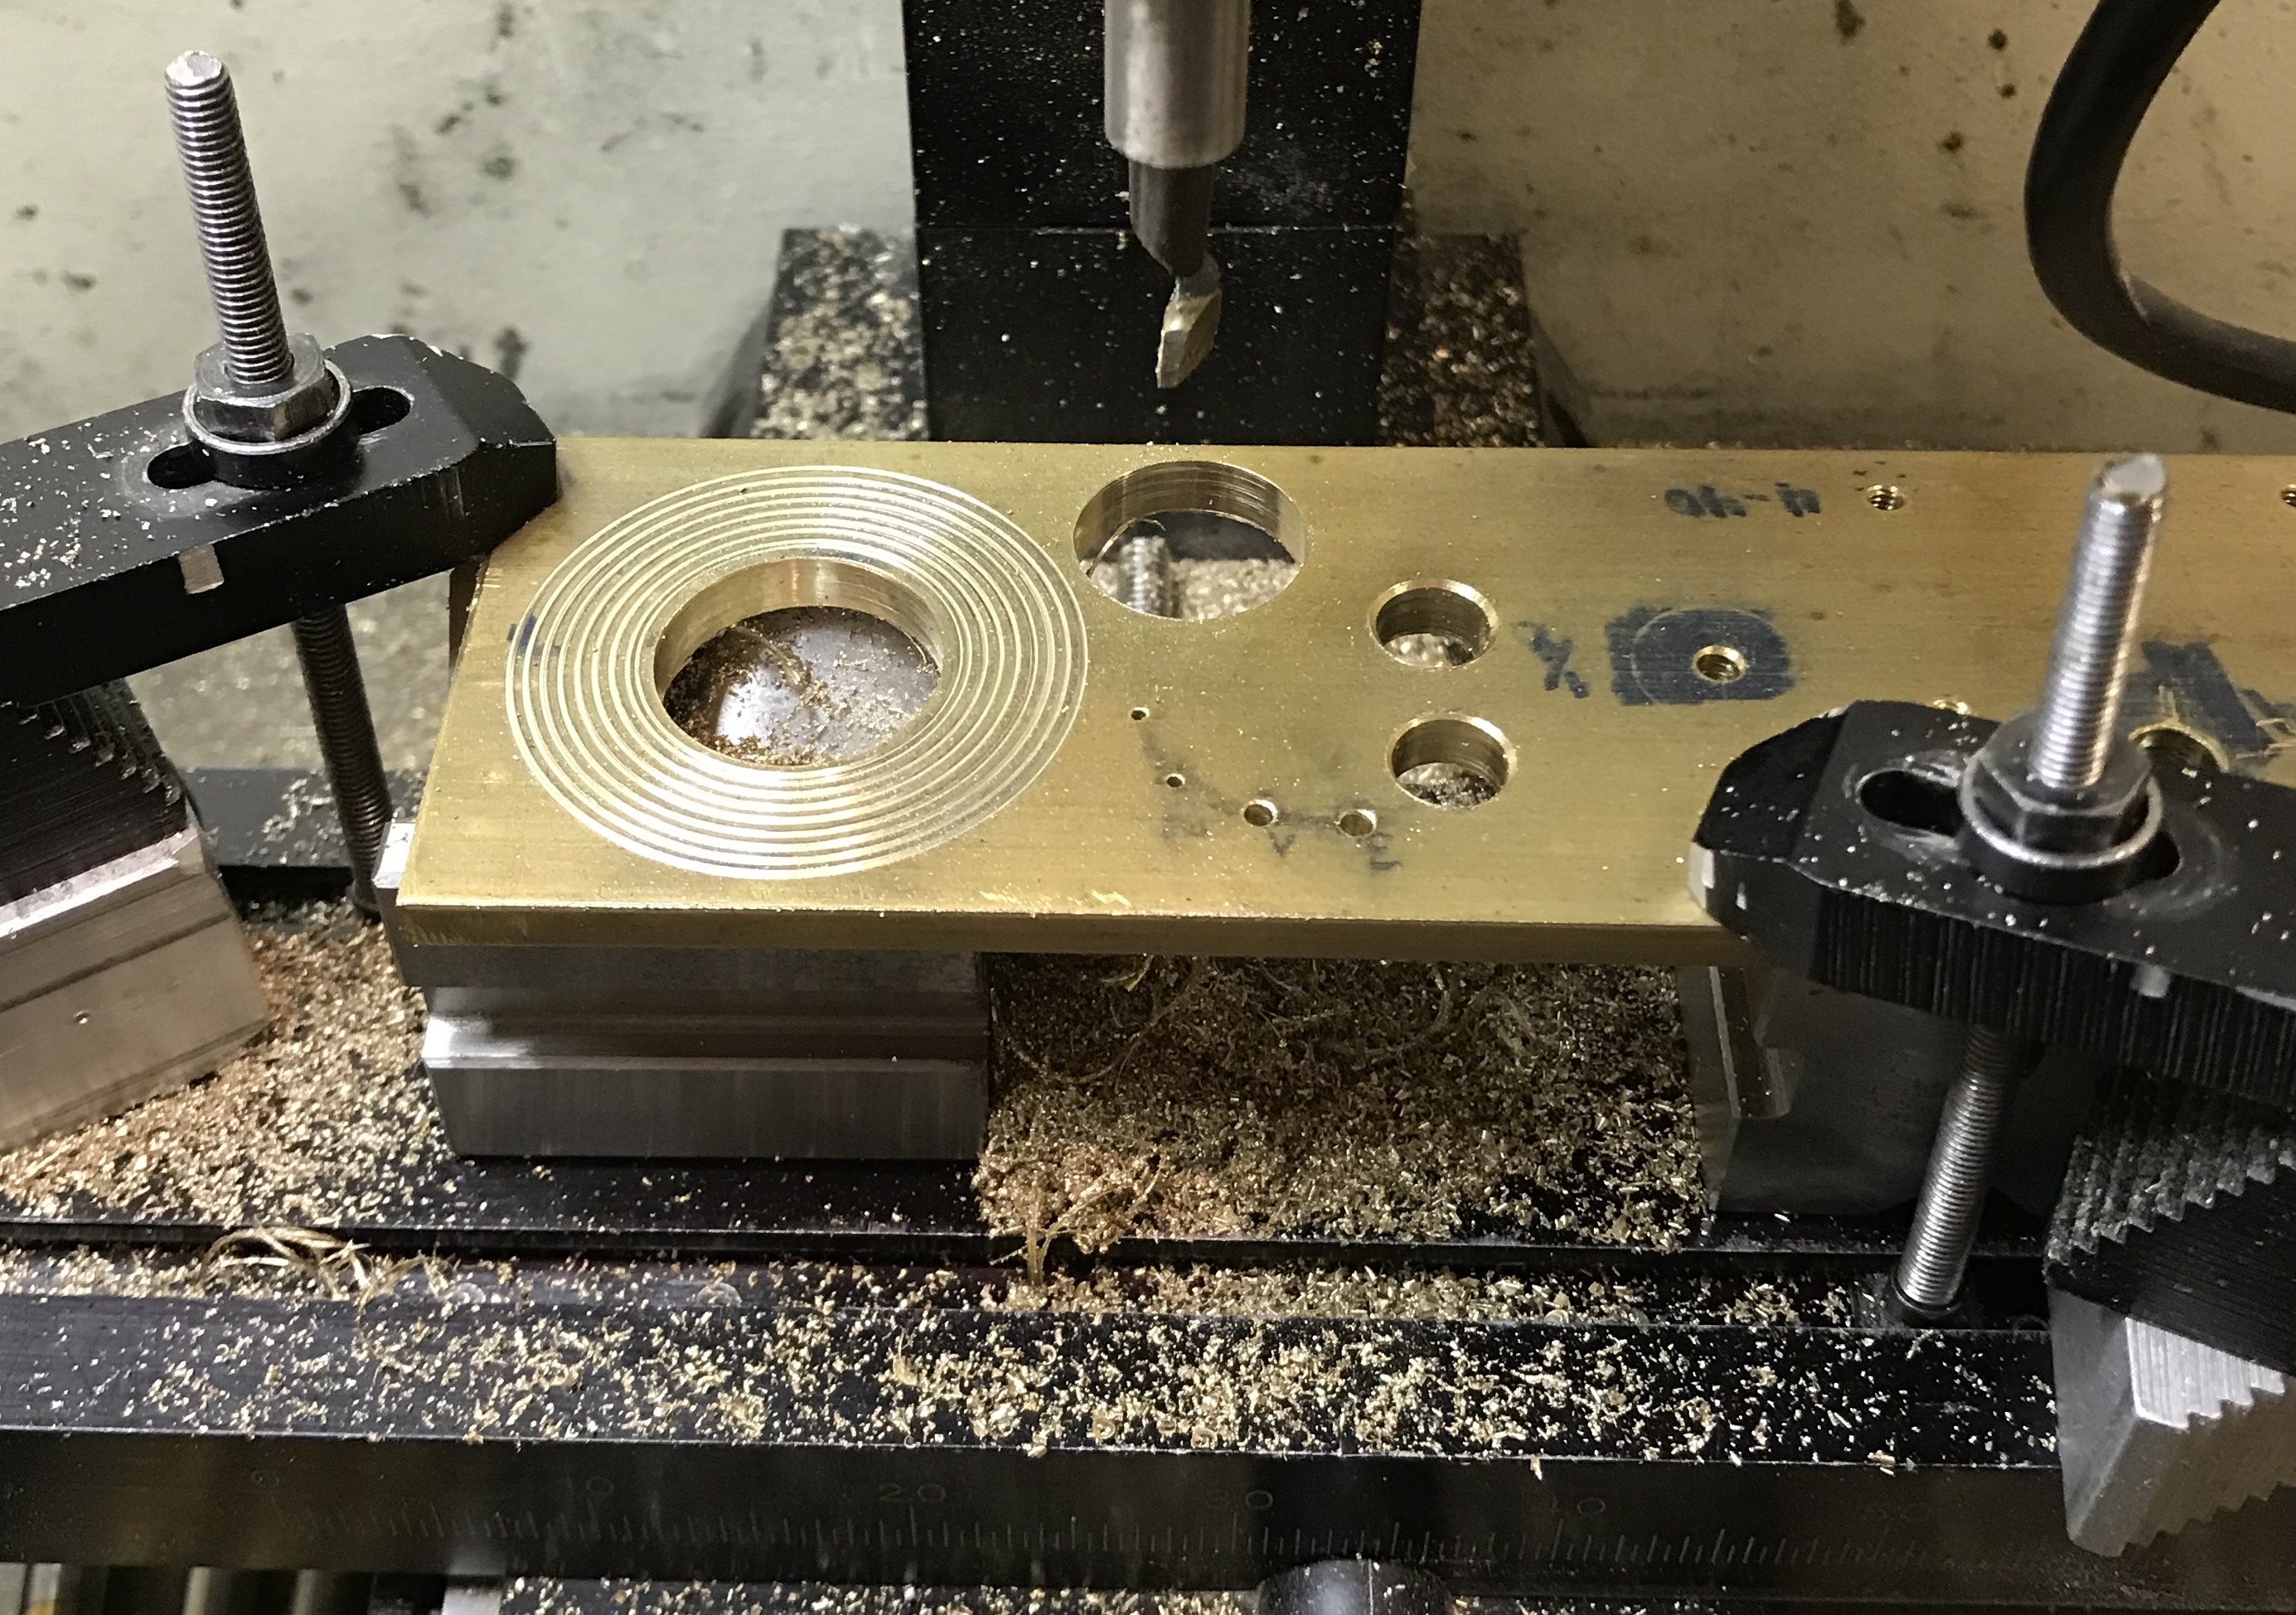
The planet holes were laid out by hand on the bottom gear support. A spiral was sketched and the planet hole locations were marked (measurements from top and left): Saturn @ 1" & 1", Jupiter @ 9/16" & 2 3/16", Uranus @ 7/8" & 3", Neptune @ 1 3/8" & 3", Earth @ 1 5/8" & 2 3/4", Venus @ 1 5/8" & 2 7/16", Mars @ 1 1/2" & 2 3/16", and Mercury @ 1 1/4" & 2 1/16". The gear support was mounted on two vee blocks and clamped with strap clamps. The sensitive drilling attachment was fitted to the mill and a #60, 0.040" drill was chucked in place. The Mercury hole was drilled at high speed with lots of pecking. This drilling was repeated for the Mars hole using a #57, 0.043" drill. Venus was drilled with a #45, 0.082" drill and Earth with a #43, 0.089" drill. Neptune and Uranus holes were drilled up to R, 0.339" and S, 0.348" drills respectively. None were a perfect match for the diameters listed above, but were as close as the available drills allowed and within the margin of error of this comparison. All holes were lightly chamfered to provide a bright finish around the lip.
The Saturn hole was made next so cutting the rings through Jupiter would not be interrupted cuts. It was drilled to 3/8" and then bored (0.0075" steps) to 7/8". The boring went well after the boring bar was sharpened. The rings were then cut every 0.050" with the boring bar to a depth of about 0.020". Jupiter was cut last. Similar to Saturn the hole was drilled to 7/16" and then bored to 1". The hole was started too close to the edge so it was moved with the boring bar about 1/8" toward the center of the bar and then opened to full diameter. The edges of the holes were deburred as needed.
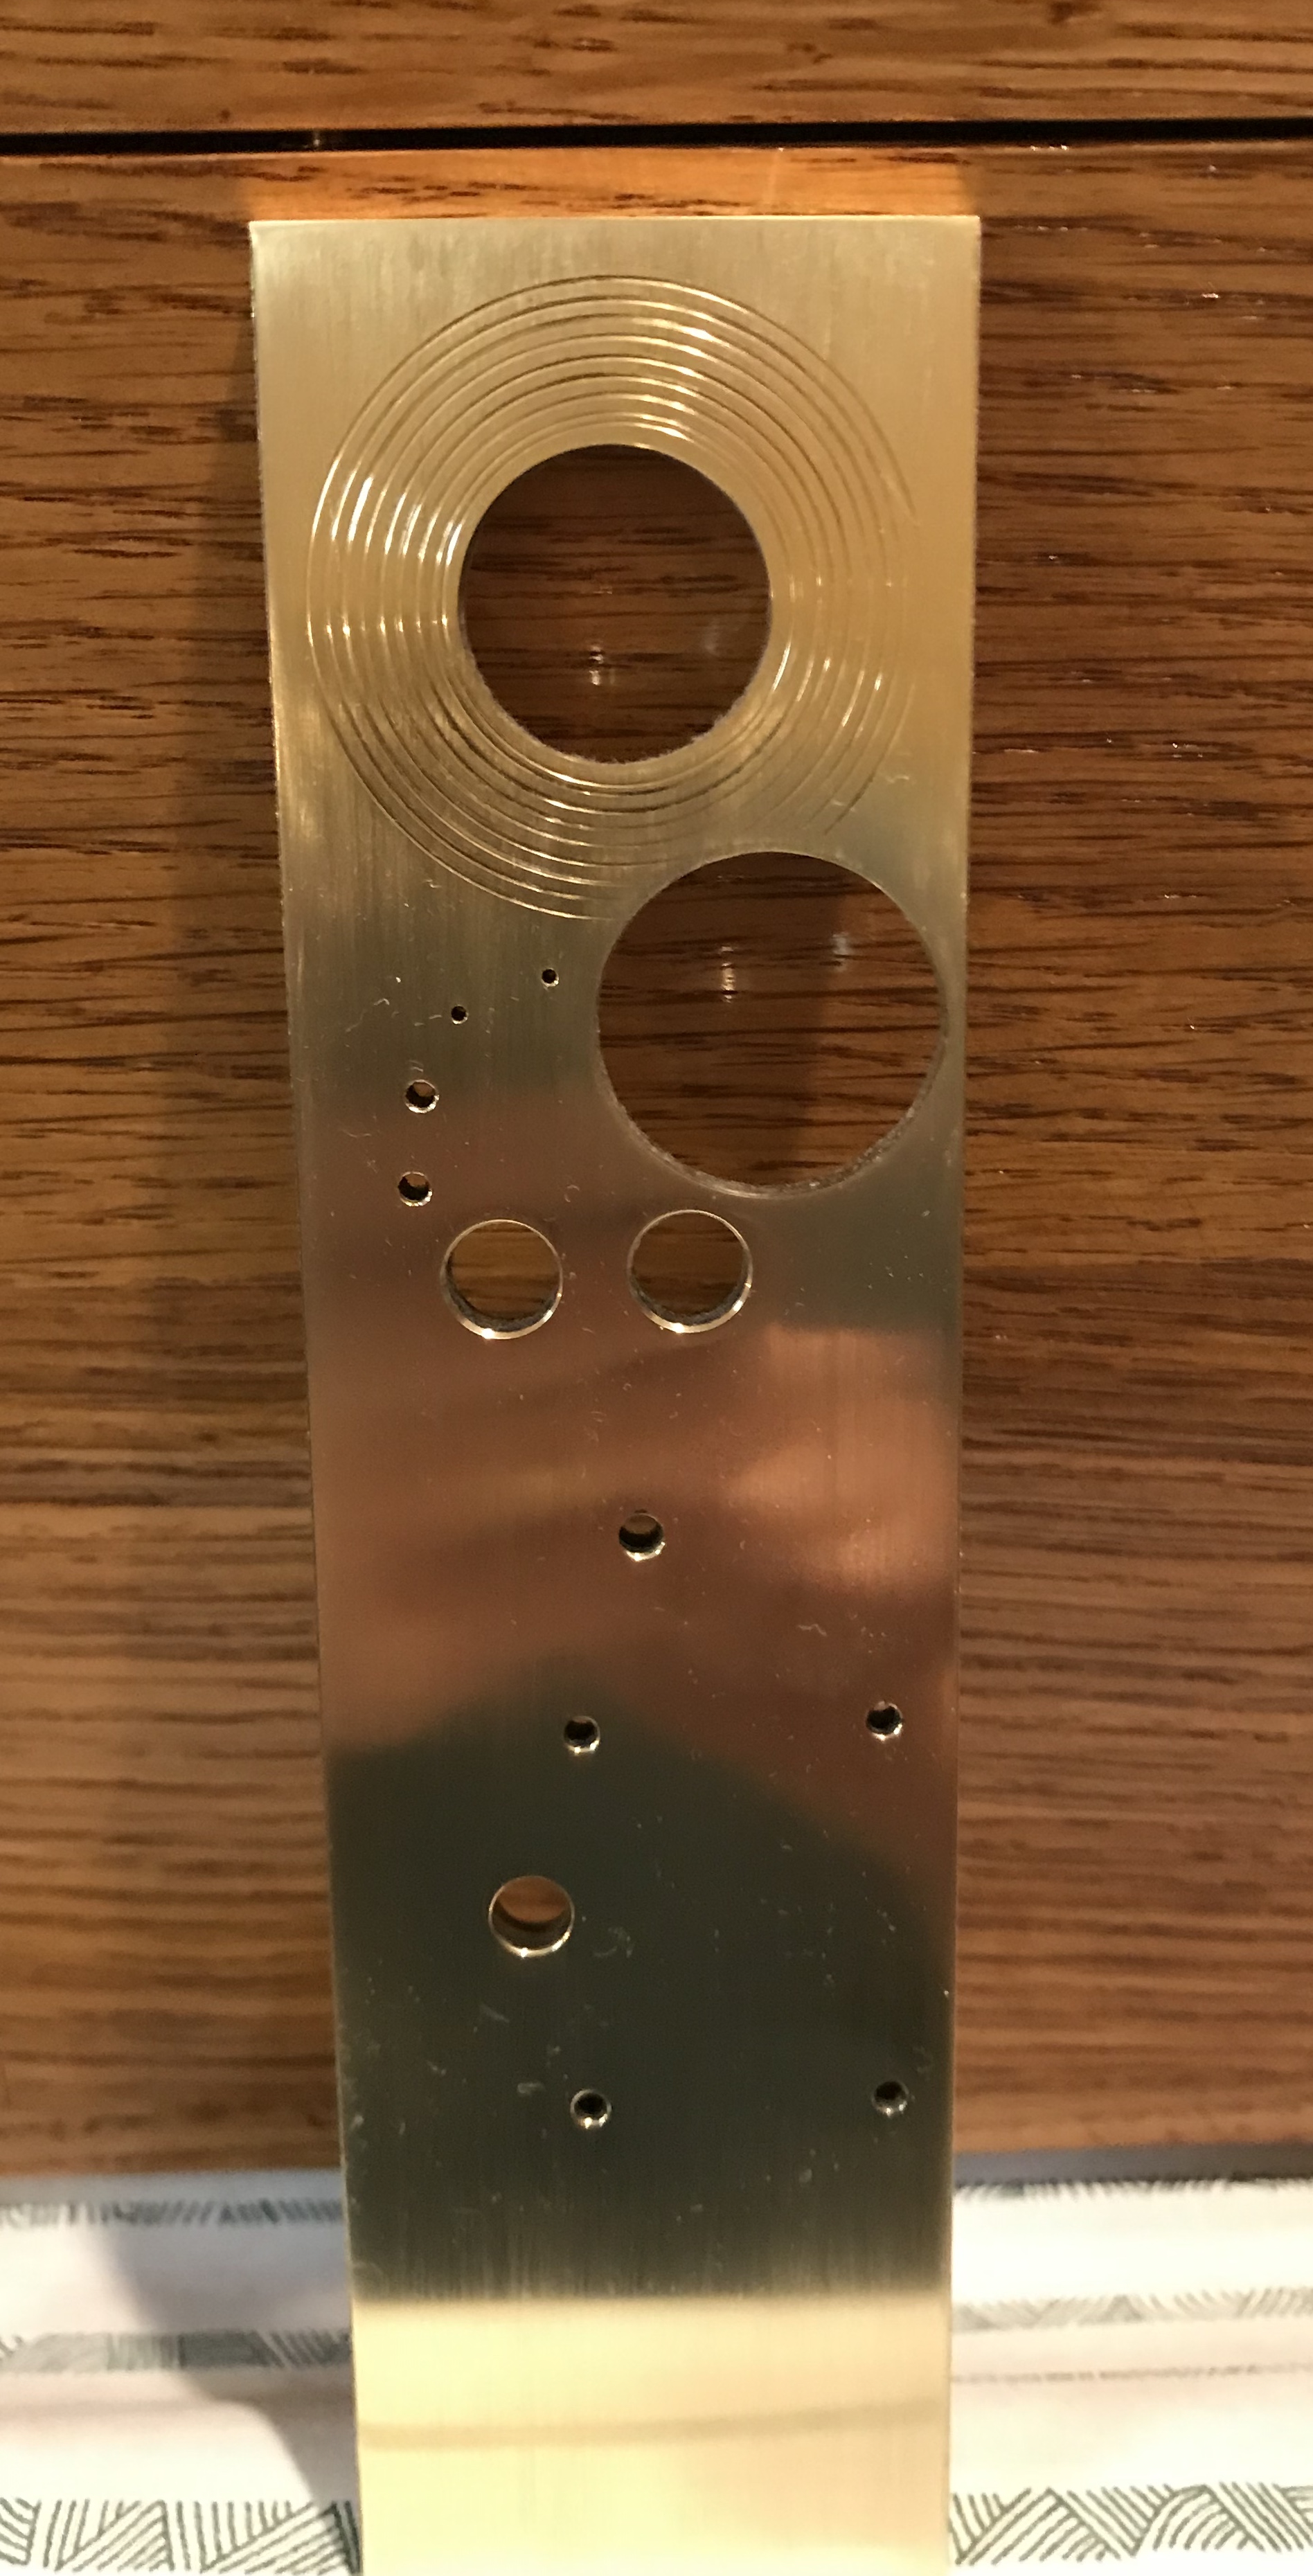
The bottom support was then sanded with 320, 400, 1000, & 1500 grit paper. And finally it was polished with red rouge on a cloth wheel. A picture of the result is below.
A scrap piece of brass was sanded with 1500 grit paper and then polished with the green polish on a cloth wheel in the drill press. Except for the scratches that the sandpaper did not remove the finish was mirror-like.

After repeating the process on a number of wheels and the top frame, I was not pleased with the results. There were tiny sanding scratches in places on all parts. So I started with the unsanded Mars ring and carefully sanded it (220, 320, 400, 600, 1000, & 1500) making sure that no scratches were visible from previous grits before moving to the next grit. This was helped by sanding each ensuing grit at right angles to the previous grit direction. The final product was quite uniform with no visible sanding scratches beyond those left by the 1500 grit paper. I am going to polish with the new polishing setup after engraving.
I grabbed this potential signature panel from letterheadfonts.com. It might work well on the bottom support as an inconspicuous place for a signature. And this author has some really pretty ornaments to use around text. Or these. Here are three font possibilities: Desire, Ephemera and Verdi. And one more from a different font repository: Claudya. And finally a Hebrew font if needed: Abetka.

Here are some possibilities for ring/frame quotes:
An engraver's block and a Lindsay graver sharpening kit (with a 2000 grit stone) were ordered today. The block is a $138 block from Amazon. Some reviews indicate that it may need some work to make it completely functional. I figure that I can put in a lot of work relative to the $500 savings versus a GRS or Lindsay block. The sharpening kit requires a number of coarser stones, if the graver is sharpened from scratch. It should be fine for resharpening my gravers with just the finer grit stone.
Since I have an extra dodecagon frame that is not quite flat, I decided to use it to try out the decoration work planned for the top dodecagon. This consists of the week lines, month lines, constellation lines, constellations, constellation symbols, and month names. A fixture is needed to hold the dodecagon for the work, so a 24" long X 7" wide board of 3/4" oak was cut in half. One long edge of each piece was cleaned up on the table saw and the two 12" boards were glued and clamped together by their long edges producing a 12" X 14" rectangle.
After significant fretting I will probably not use a wooden support on the rotary table. There is no need for that level of precision and I am not going to make week marks. At this point I plan to mark the months and the constellations with 1/4" lines. To this end a piece of polished brass was held in the mill vise and the milling head tilted 45°. [In order to make this work the vise needed to be elevated about 1".] A number of cuts of varying depth were then made with a 1/8" end mill. One set of cuts was made with movement on the y-axis giving a vee groove. The other set of cuts was made with x-axis movement giving a round cut. The depths of the cuts varied from 0.005" to 0.040". In both cross sections the shallowest cuts were sufficient to clearly be seen. I prefer the round profile cuts, specifically the shallowest 0.005" cut. They show more highlights. In addition the end of the vee grooves are rounded on one side due to the round profile of the end mill. Taking a picture of something so shiny is difficult, but the photo below shows the differences between the round (right) and vee groove (left) cuts.
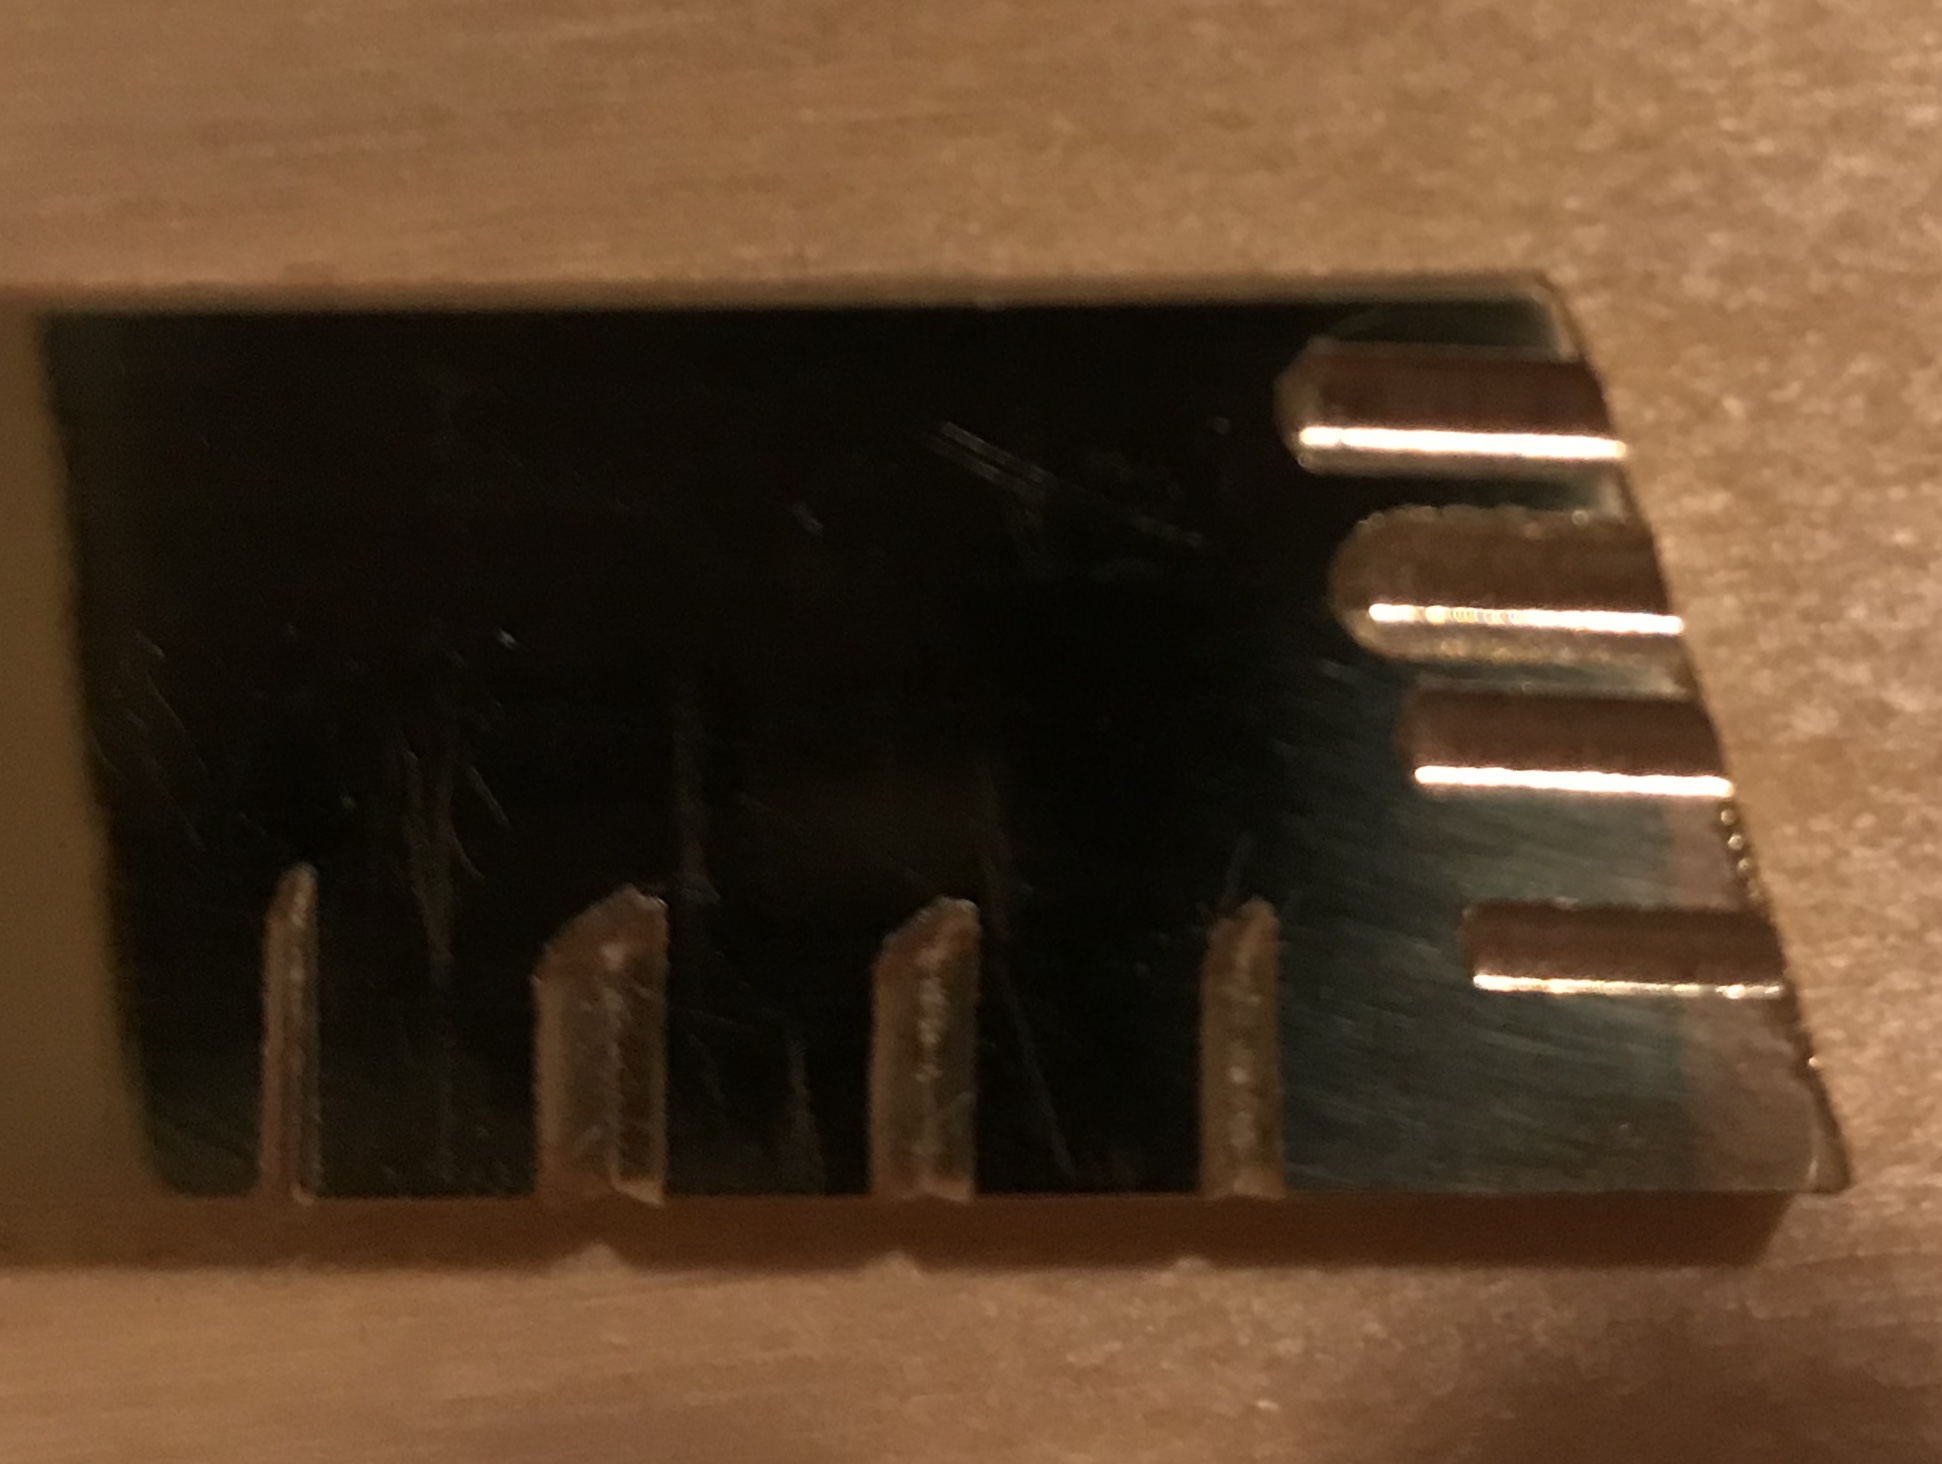
The nicely rounded ends of the round profile cuts came from pulling the end mill into the work. That is the end mill was pointing down and to the left, while the work was moved into the cutter from right to left.
On further thought this approach is a non-starter. There is no means to secure the dodecagon in order to position the correct positions below the cutter. It is just too large. It could be done by the vee groove method, but I don't like the look of the end of the cut. Or maybe using a 45° adapter for the vertical milling table on the lathe?!? Simplest would be purchasing a 1/16" end mill and going with a flat bottomed cut.
The lines marking the month and constellation divisions should be set pretty precisely. To that end the outer circumference of the frame is 29.25" giving 0.080" per day. So a 28 day month is 2.244" (2 8/32"), a 30 day month is 2.404" (2 13/32"), and a 31 day month is 2.484" (2 15.5/32"). In this way the months were remarked on the diagram shown above. The constellations were marked using the data from the following chart, where 32FPM stands for "32nds from prior month". Measurements for the constellations were made on the outside and transferred to the inside.
| Constellation | Begin Date | End Date | Dist Begin (in+32FPM) | Dist End (in+32FPM) |
|---|---|---|---|---|
| Aries | 19 Apr | 13 May | 1.523 (1+17) | 1.042 (1+1 1/2) |
| Taurus | 14 May | 19 Jun | 1.523 (1+17) | |
| Gemini | 20 Jun | 20 Jul | 1.603 (1+19) | |
| Cancer | 21 Jul | 9 Aug | 0.721 (23) | |
| Leo | 10 Aug | 15 Sep | 1.202 (1+6 1/2) | |
| Virgo | 16 Sep | 30 Oct | 2.404 (2+13) | |
| Libra | 31 Oct | 22 Nov | 1.763 (1+24) | |
| Scorpius | 23 Nov | 29 Nov | 2.323 (2+10) | |
| Ophiuchus | 30 Nov | 17 Dec | 1.362 (1+11 1/2) | |
| Sagitarius | 18 Dec | 18 Jan | 1.442 (1+14) | |
| Capricornus | 19 Jan | 15 Feb | 1.202 (1+6 1/2) | |
| Aquarius | 16 Feb | 11 Mar | 0.882 (28) | |
| Pisces | 12 Mar | 18 Apr | 1.442 (1+14) |
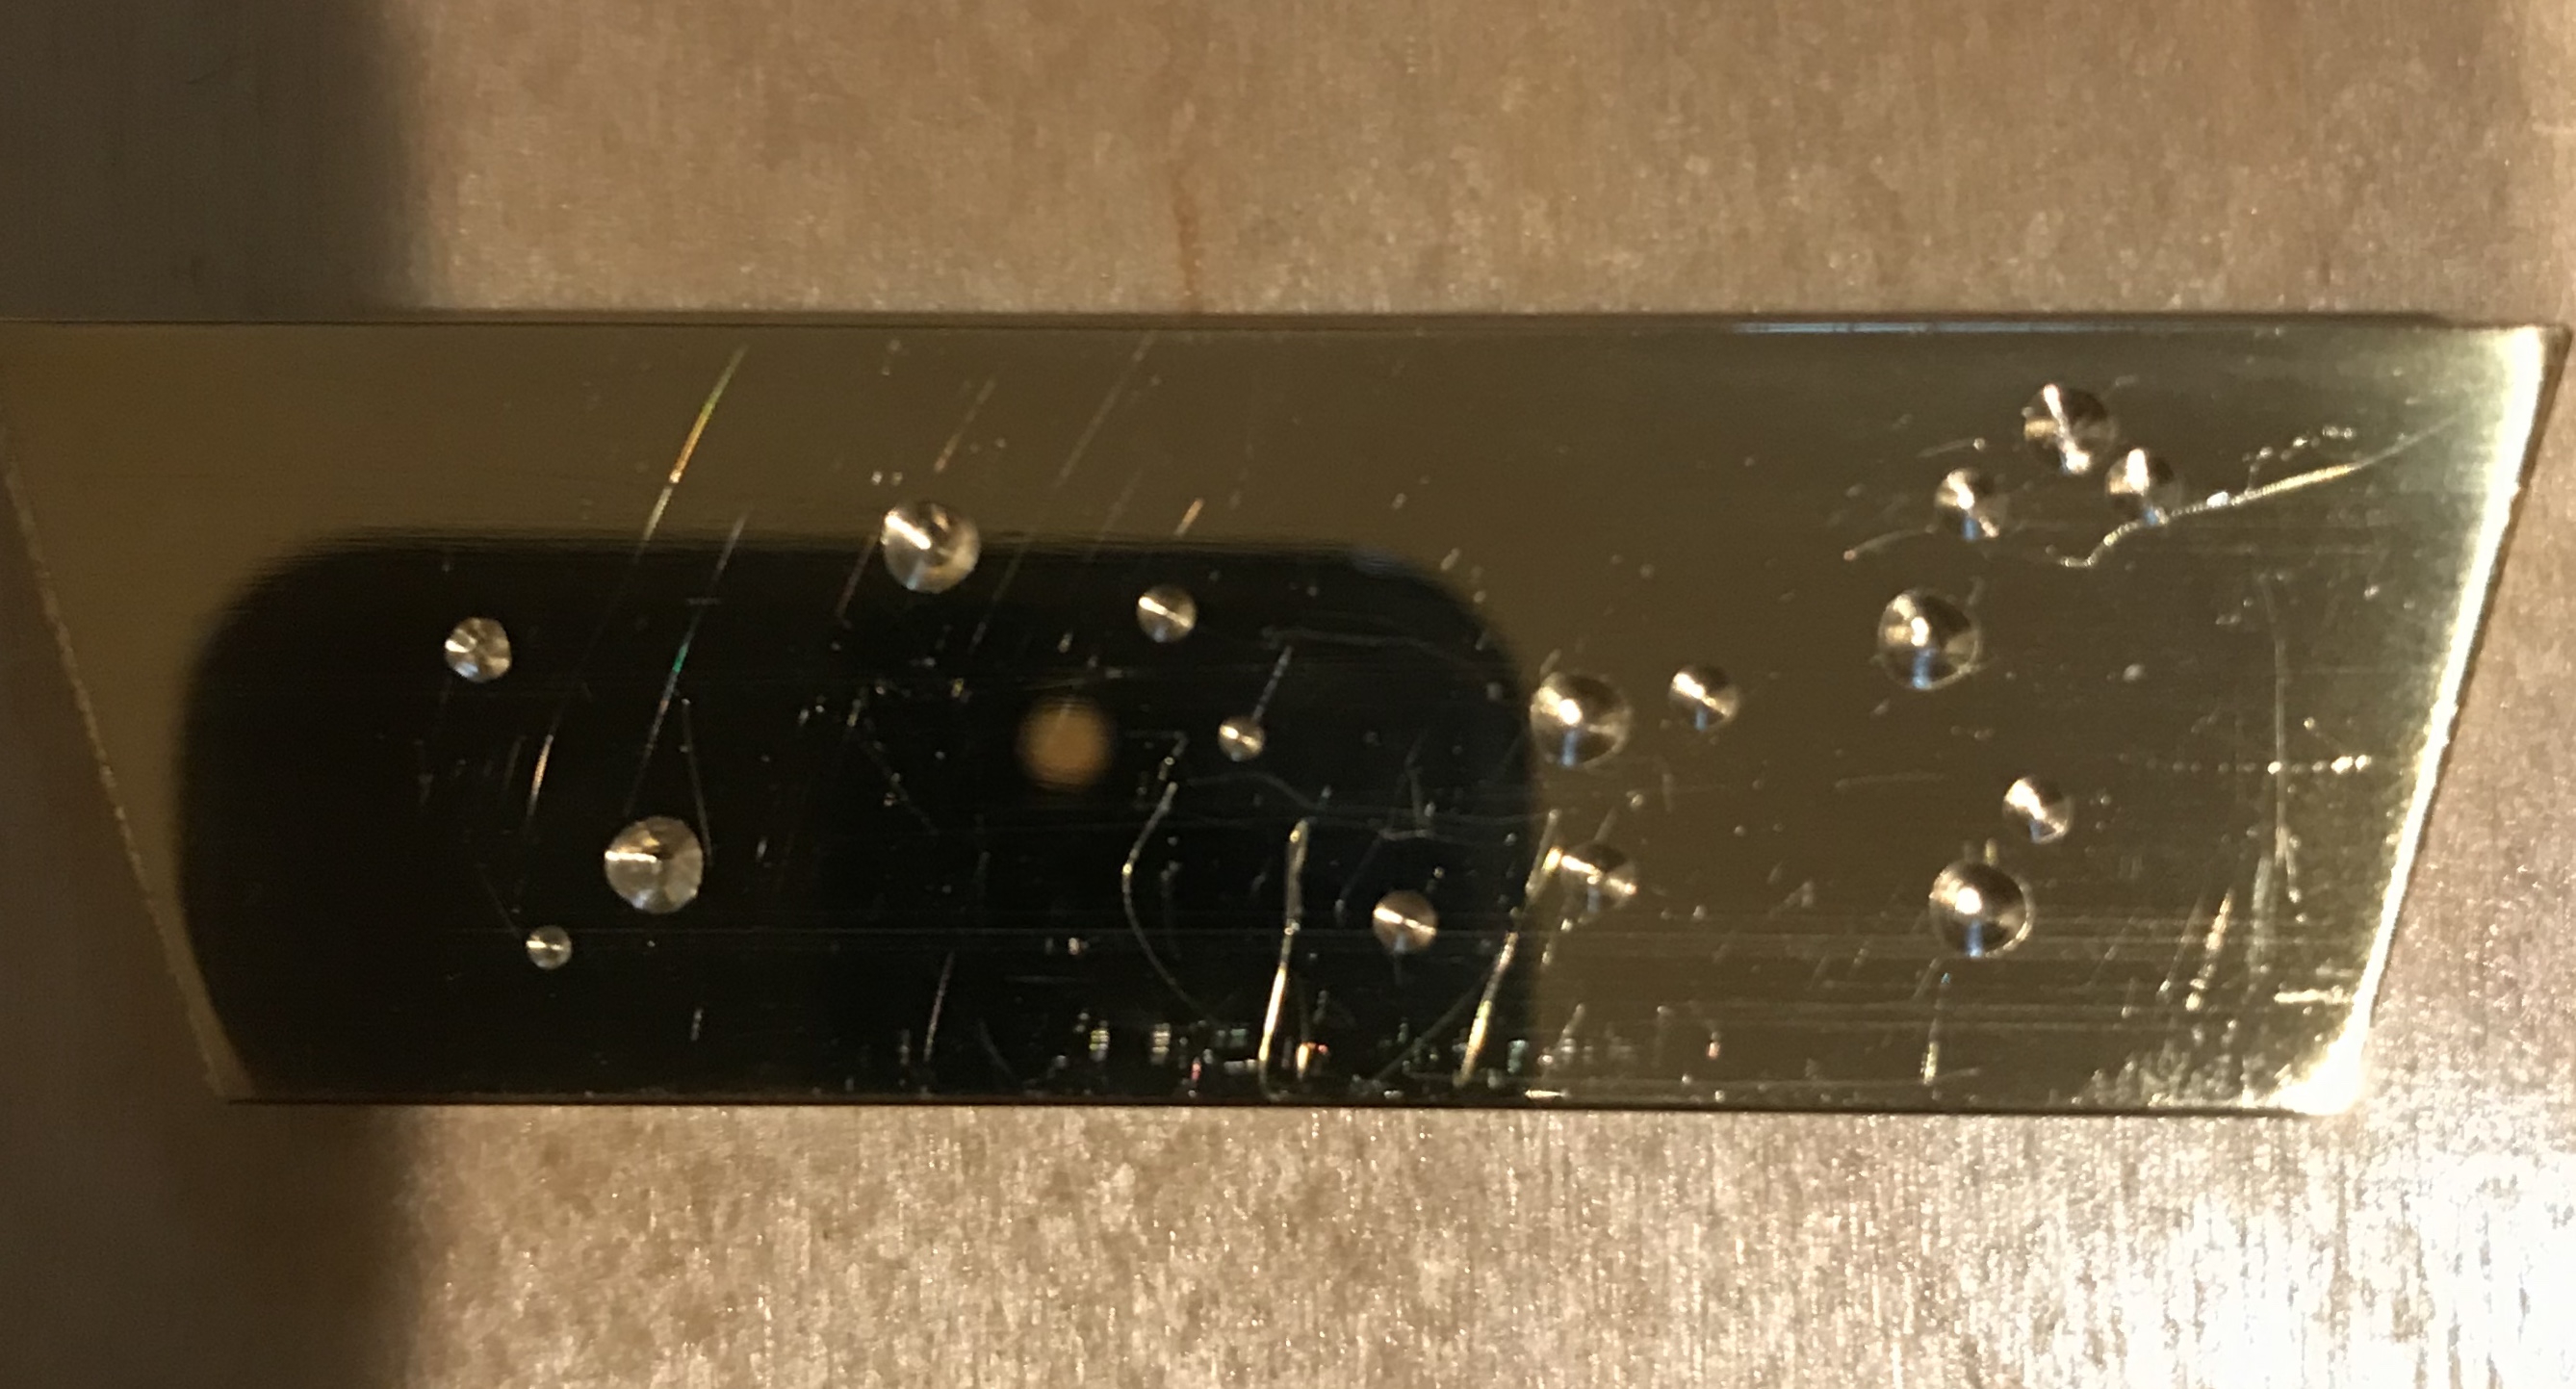
Next up was determining the best way to represent the constellations on the top frame. Using Swarovskii crystals (the flat-backed ones usually seen glued to fingernails and toenails) and just plain drilling were considered. I decided the crystals might be too gaudy, so I explored drilling. Two drills were selected for the two hole sizes needed (#45; 0.082" and #31; 0.120"). The small drill was tried at a range of depths: 0.005", 0.010", 0.015", and 0.020". The larger drill was tried at two depths: 0.020" and 0.035". The results of these attempts for the simple constellation, Aries, can be seen on the left side of the picture below. I preferred the looks of the 0.015" depth for the #45 drill and the 0.035" depth for the #31 drill. Leo was drilled at these depths and is seen on the right. It is a denser constellation than Aries in terms of number of stars in the standard representation. I am not sure at this point whether or not to "connect the dots." An attempt with a straightedge and a scribe looks pretty good.
The extra frame was used for the following exploratory decoration. The month and constellation boundaries were transferred from the large diagram and then cut in the mill. A 1/16" end mill was used and the slot was milled 0.008" deep. Holding the frame in the small vise on the Sherline mill worked out fine. Two parallels were used and the vise was tightened while pressing down above the parallels. The "horizontal accuracy" was checked by inspecting how tight the parallels were. The slots were cut 0.175" long. The slots were then deburred with a small flat file. The constellation markers had significant burrs, whereas the month markers had little burr. This must be a consequence of the direction of the cut.
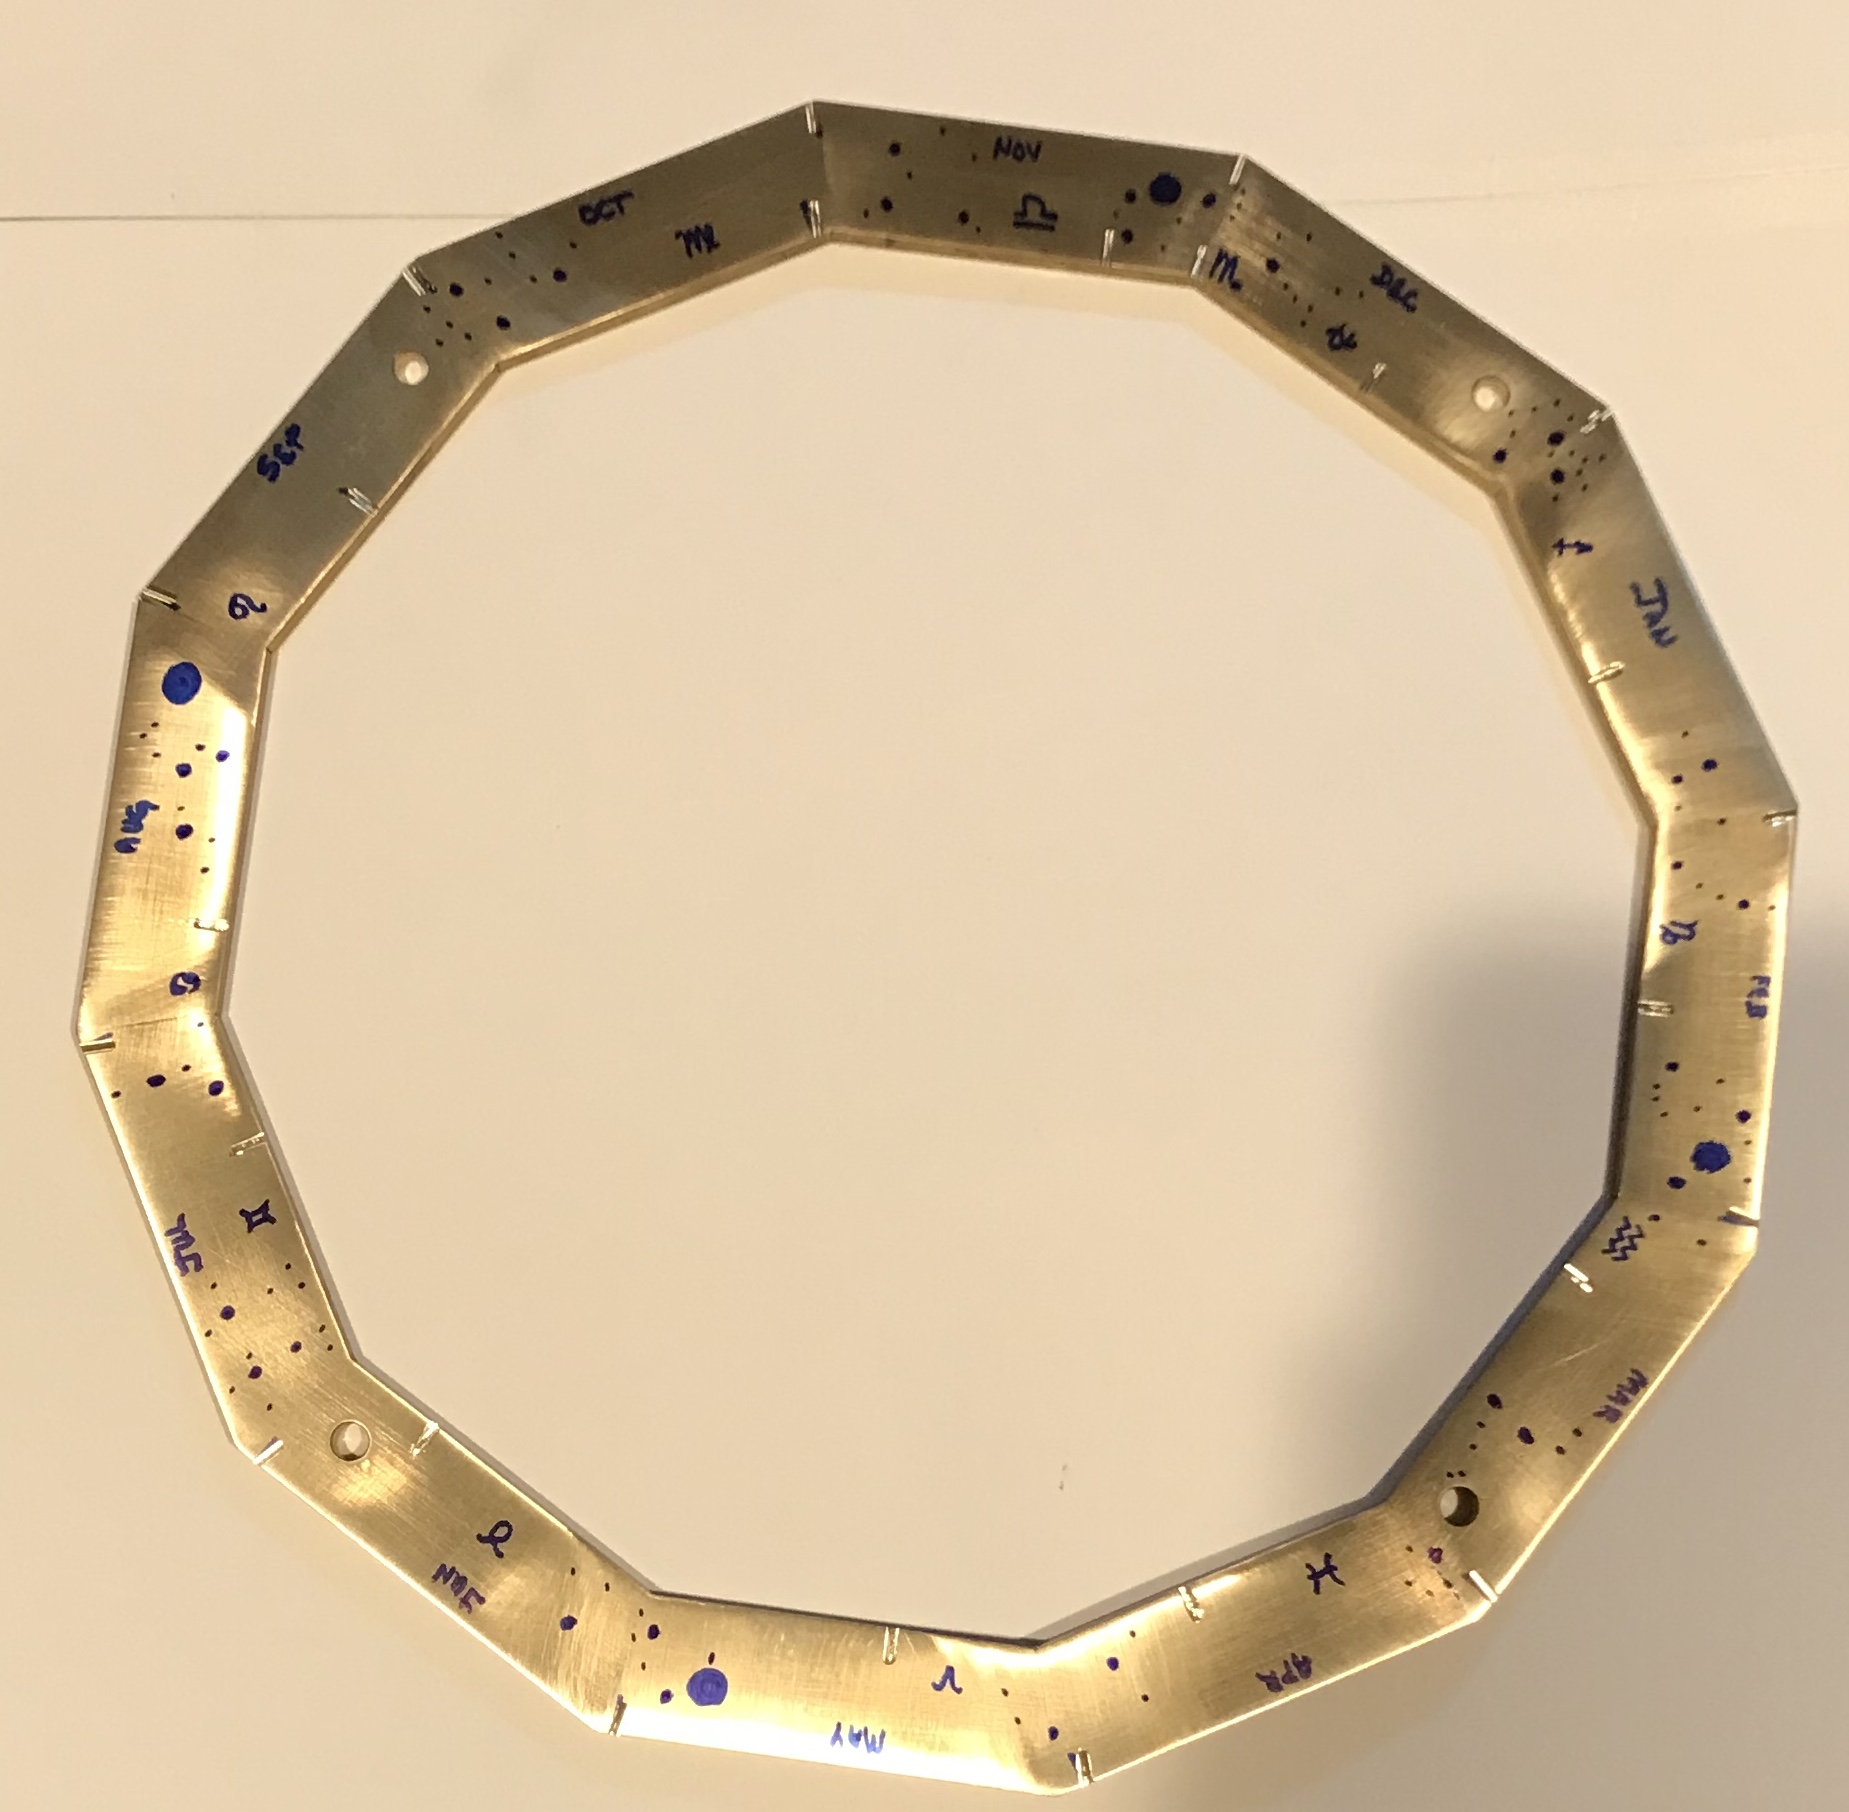
The month abbreviations, constellation symbols and constellation stars were marked with a Sharpie to determine where drilling and engraving would take place. A picture of this layout is included below. When laying out the month markers I did not take into account the correct location of the holes for the columns (I want January to be at the top of the frame when the handle is on the right). So I ignored the holes in this frame and marked where the holes will be in the real frame. The only real challenges were fitting Scorpio and Ophiucus in November and December. They are large constellations and they have very short periods of opposition.
After multiple alternate projects the orrery is back at the top of the list. I decided to try painting the planets. To this end some acrylic paint was purchased at an art store. Earth: A base coating of blue will be applied first. This will then be covered lightly with white paint to simulate the famous blue marble picture of the earth from the moon. Venus: Simply a base coat of white applied thinly so some brass shines through. Mars: Will also begin with a brass ball, but a reddish brown paint will be applied. Mercury: May simply use an aluminum ball. Sun: A large and highly polished brass ball is planned. Will probably spray coat all planets and the sun with clear varnish as is planned for all of the polished brass parts.
A couple of approximately 1/2" brass balls were made on the Sherline lathe using the ball cutter. The free end was drilled and threaded and the ball was sanded to 1500 grit prior to parting it off. One ball was placed on a screw and "roughed up" with 320 grit sand paper. A thin blue paint layer was brushed on (a bit of brass could be seen in places). See Orrery Planets for the completion of the planets.
After finishing the planets (except maybe painting Mercury) it was time to return to decorating the frame with months and constellations. This continued the work from above. The frame was held in the Sjoberg vise. The engravers vise will need a fixture of some sort to hold the frame. Three constellations were drilled. The bright stars in each were drilled with a #45 drill just deep enough to produce a full size (0.082") circle. The dimmer stars were drilled with a #0 starter drill. Two months were sketched out with pencil on china white. Lines were drawn for upper and lower case letters. These lines were 7/32" apart for upper case letters and 3/32" apart for lower case. The Savoye LET font was used. The letters were engraved and the china white was removed with H2O. The photo below shows the results. The letters are hard to see and the brass has yet to be polished. The stars look pretty good, however.
An attempt was also made to blacken the month/constellation markers. A painter's spatula was heated with a propane torch, used to scrape up some dial wax, and spread it into the month groove. Multiple problems were encountered: the spatula cooled too quickly, the brass frame needed to be warm, and finally sanding removed the wax from the groove. Doing this right is going to take some experimentation.
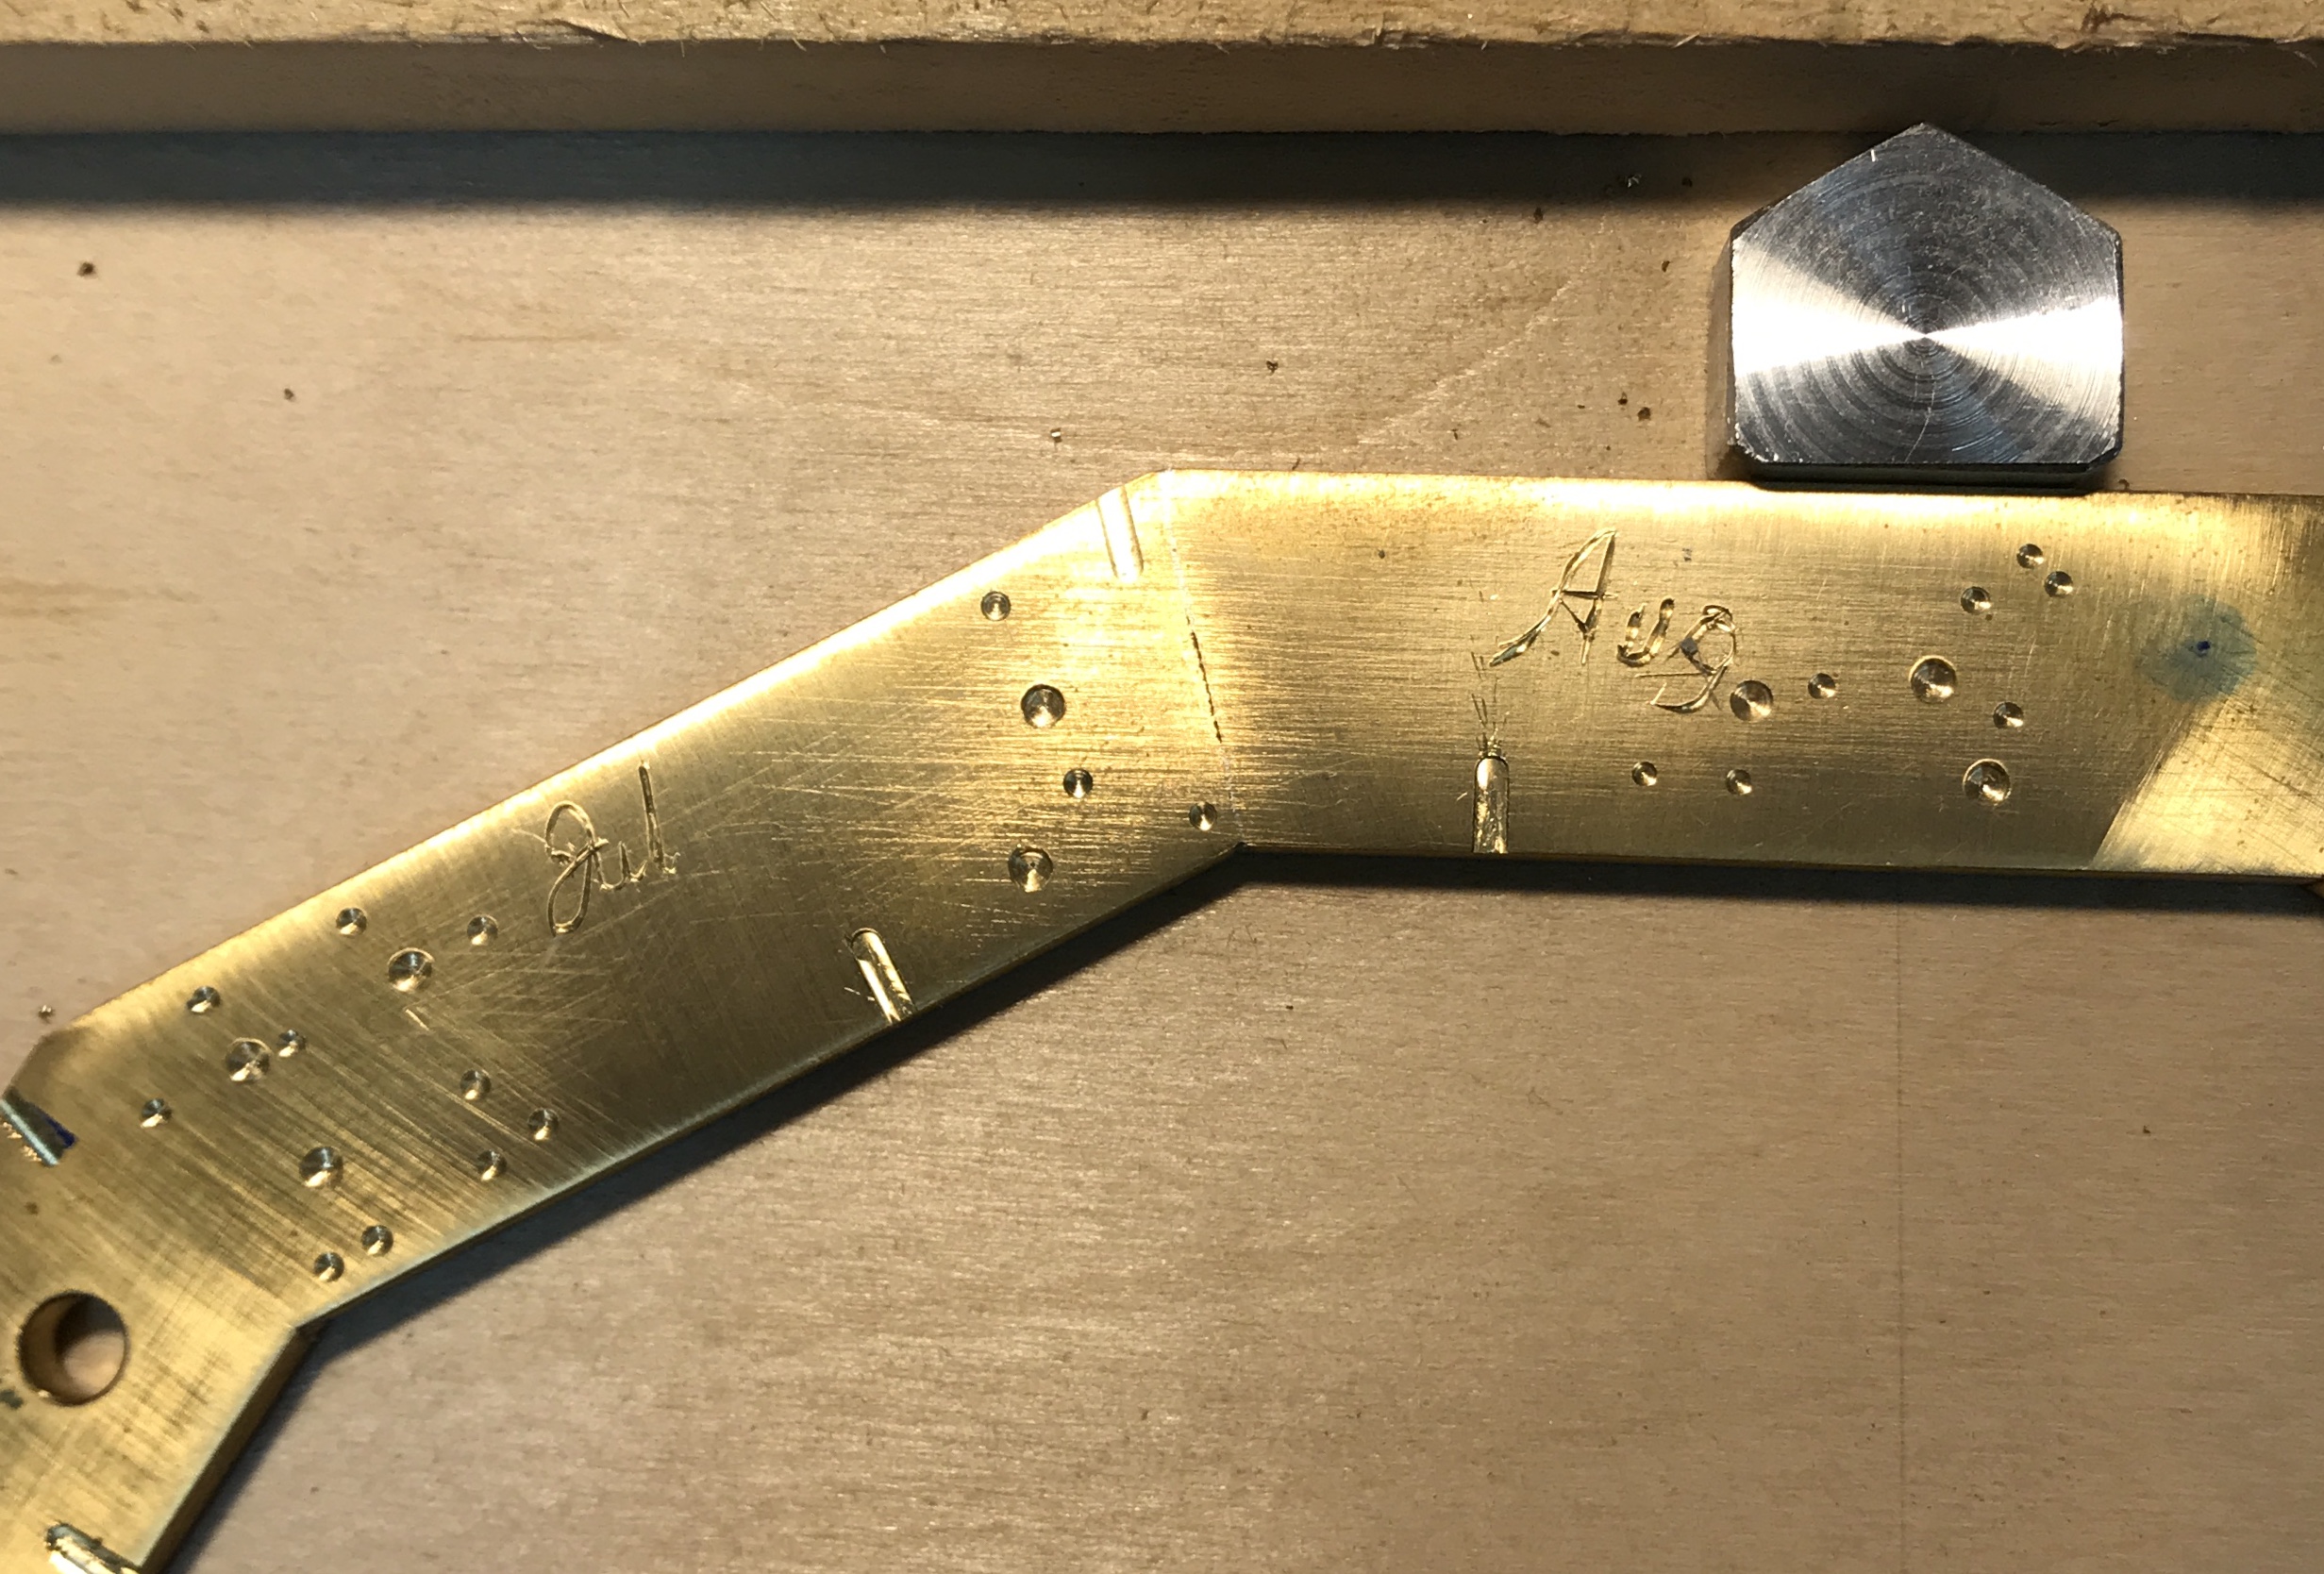
A woodburning set was purchased. The heated tool's temperature can be adjusted from about 300° to 450°. The tool was plugged into the outlet and the control set at 350°. The tool tip chosen readily melted the dial wax and with a little practice the melted wax was transferred to the machined marks in the dodecagon. In some cases too much wax was added and probably should have been scraped off. Sanding off this hardened wax was challenging. The real problem arose during the sanding phase as once again only one of four grooves "waxed" retained the wax upon sanding!! It is not clear why the wax sticks so well to the face of the dodecagon and not to the bottom of the groove. An engraved month abbreviation, "Aug", similarly did not retain the wax upon sanding.
Maybe alternative month and constellation marks need to be considered. One possibility is to use a file and make triangular marks at the appropriate locations. These could be made part way through the rim or all the way through. The engraved month abbreviations and constellation symbols will need to be deeply engraved to make them visible and bright.
I like the triangle marker seen above. It looks different depending on the viewing angle. Trivial to cut with a small triangular file, it produces polished cut faces and clean edges. KISS!!
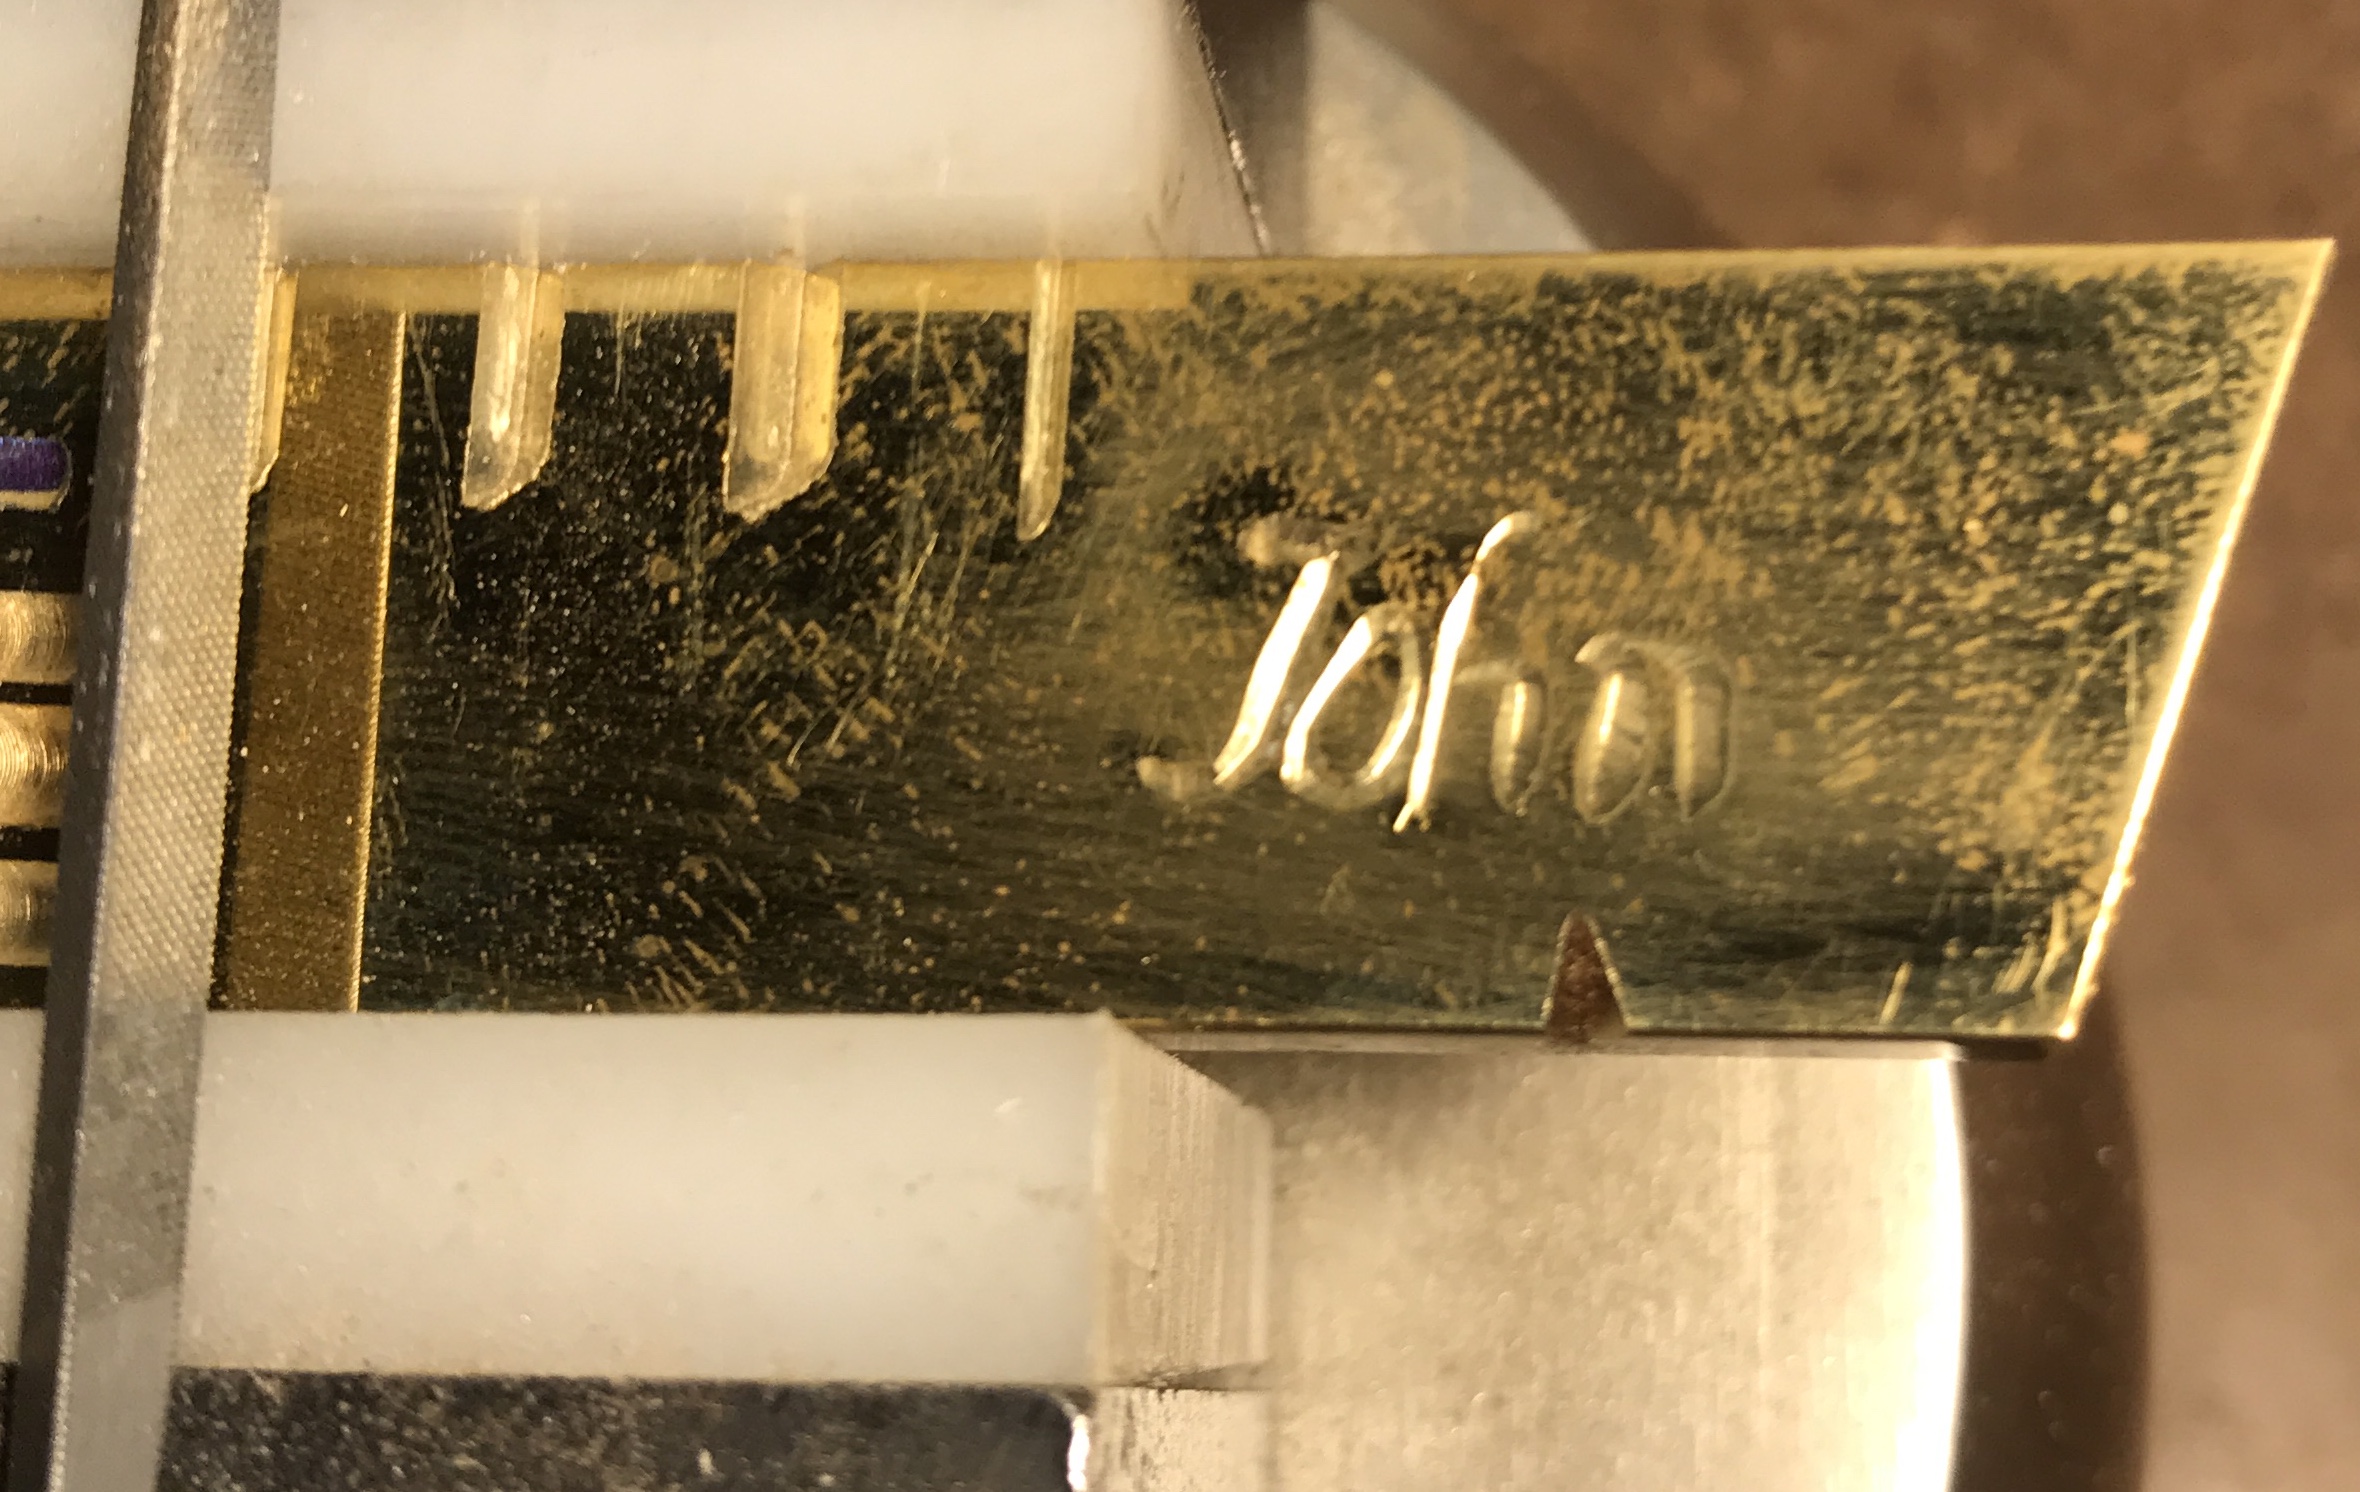
The final consideration is font choice for the month abbreviations. I used Charm from Google fonts for the toolbox name plaque and it was relatively simple to engrave and looks pretty nice.
Jan Feb Mar Apr May Jun Jul Aug Sep Oct Nov Dec
Ok. On to the real thing! I removed the top frame from the partially assembled orrery. Marks for the months and constellations were made with a Sharpie. The constellations were printed and cut out. Each constellation was taped to the dodecagon in the appropriate place. They were sized to pretty much span the full width. It was a challenge to place the 3 constellations that are at opposition in December. The plan is to drill the constellations first, followed by filing the month and constellation marks. Room has been left for both month names centered in each side of the dodecagon and constellation symbols that will be placed just before each constellation.

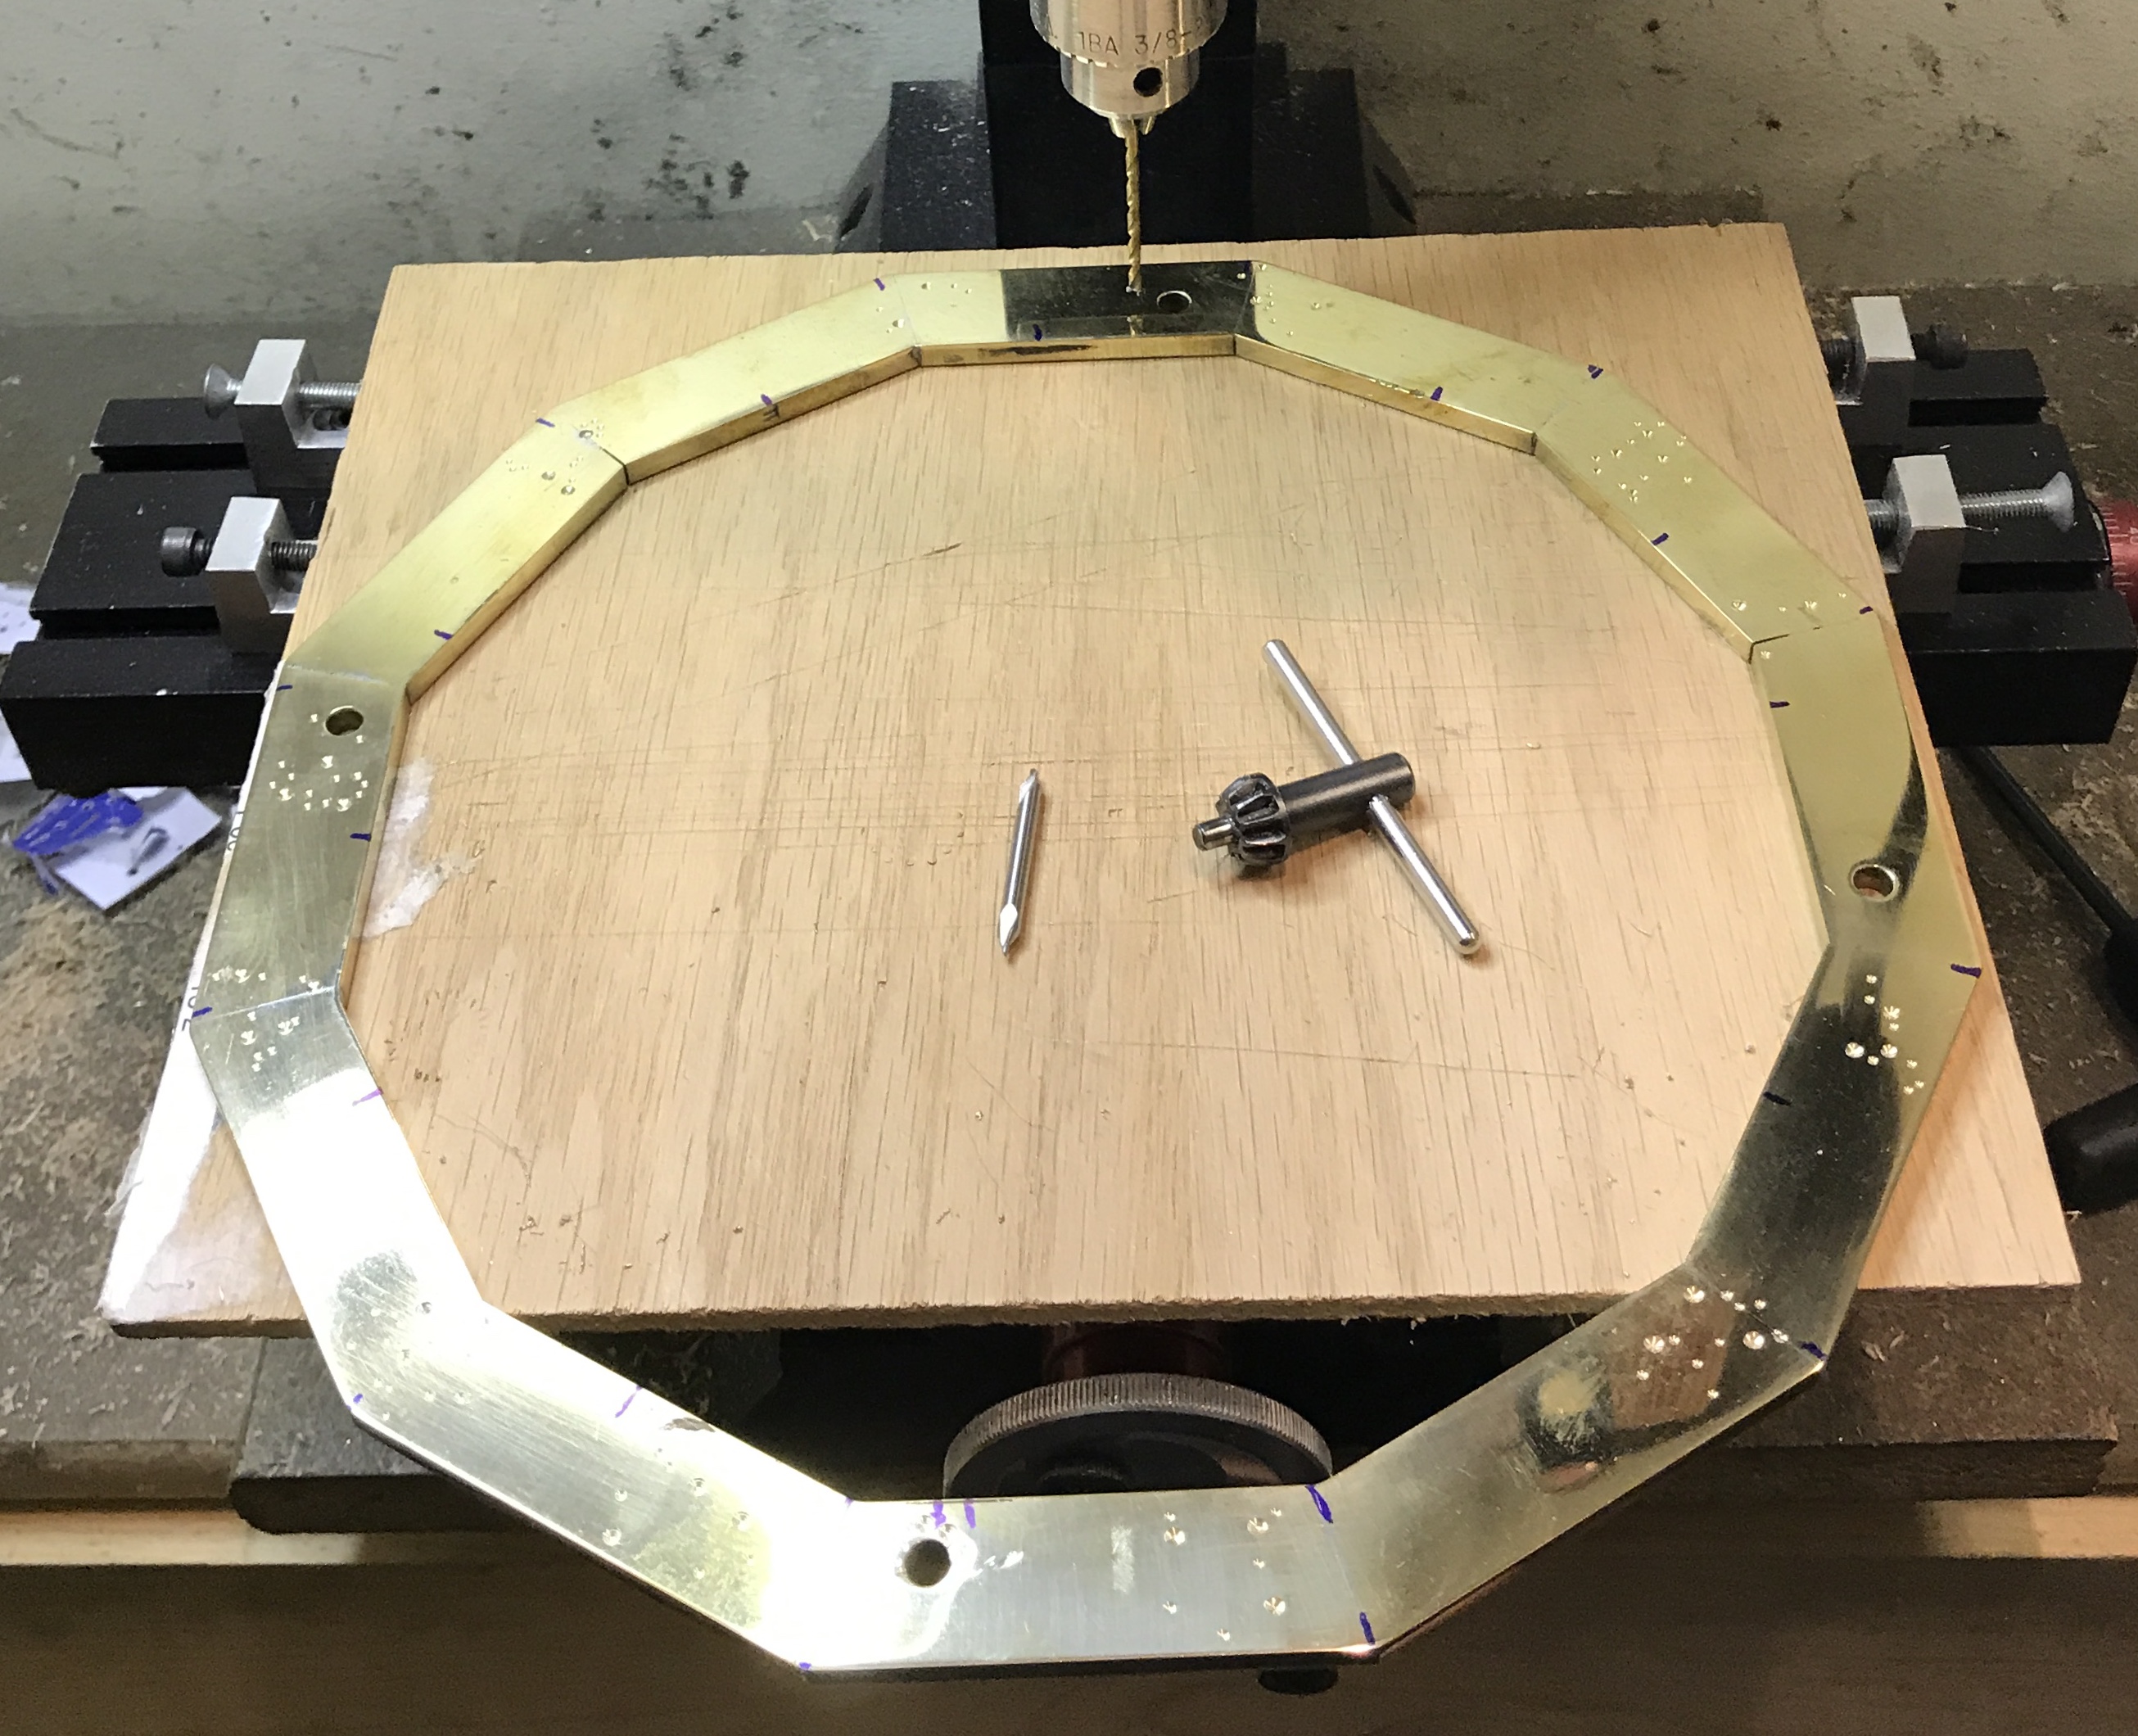
The holes were drilled for the constellations. Wound up just using the #45 drill for both sizes of holes. The larger holes were drilled until the drill just broke through the paper and the smaller holes were drilled about 0.025" shallower. This was all done on the Sherline using a clamped piece of wood to "enlarge" the work surface as seen in the following picture taken after all of the constellations were completed.
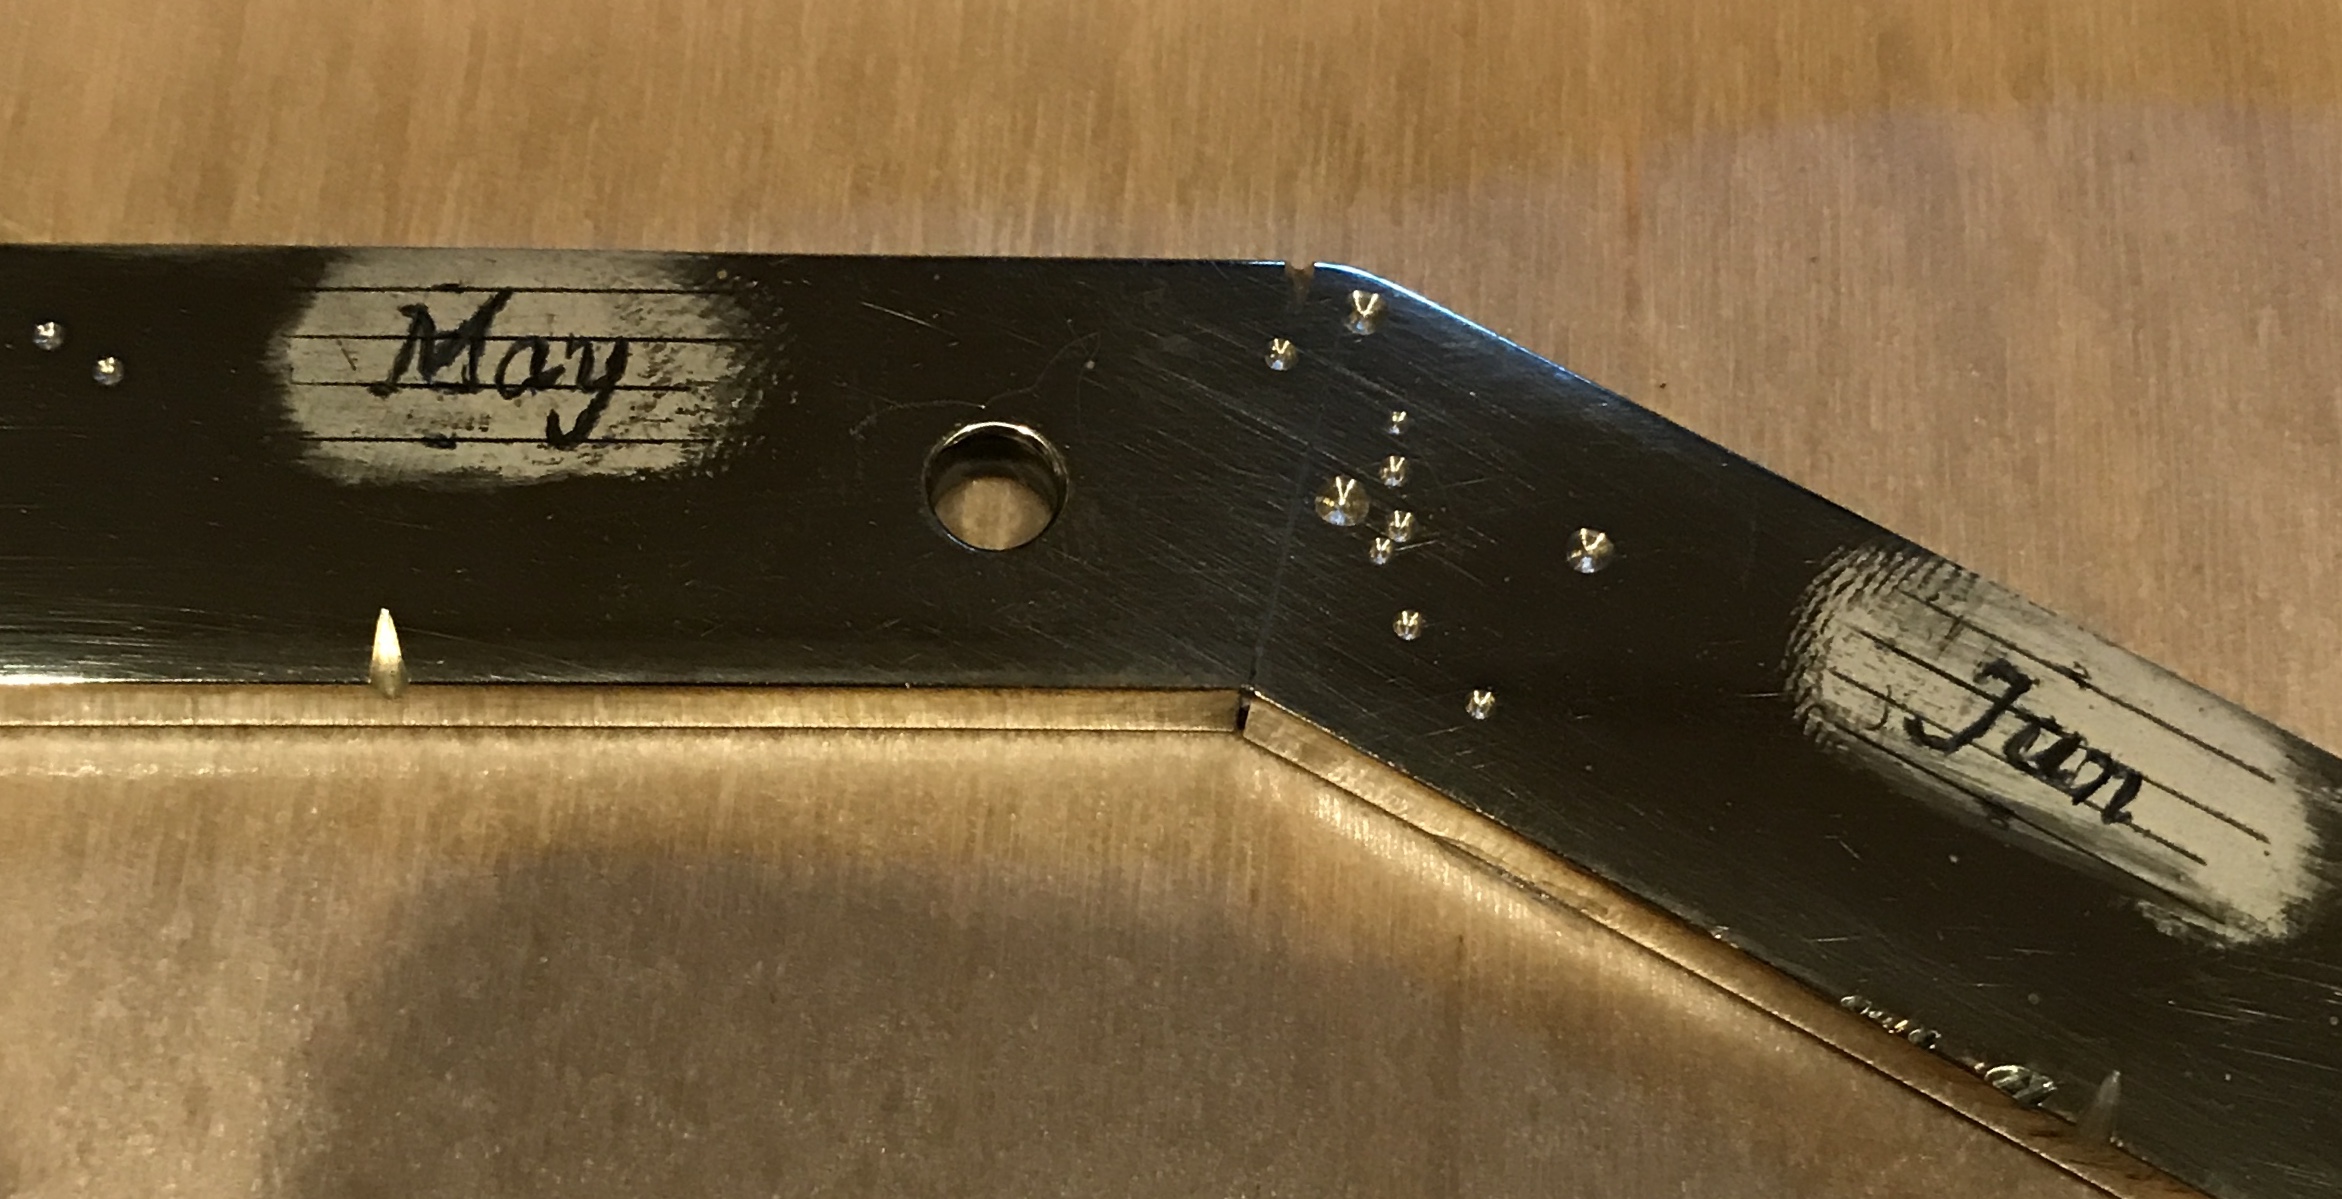
The marks for the months and constellations were then filed on the outside and inside of the dodecagon respectively, at the marked locations. A small three-corner file was used and held at about 20°. Twenty to twenty-five strokes left the desired length mark.
The month names pictured above seemed to be the perfect size for engraving. Measurements were made and four lines were marked with a pencil on the china white smears made for each month. The outermost line was 3/32" from the edge of the dodecagon and the other lines were all separated by 3/32" as well. The letters were sketched onto the china white as seen in the following photograph. The line drawing and lettering were done while wearing the Optivisor.
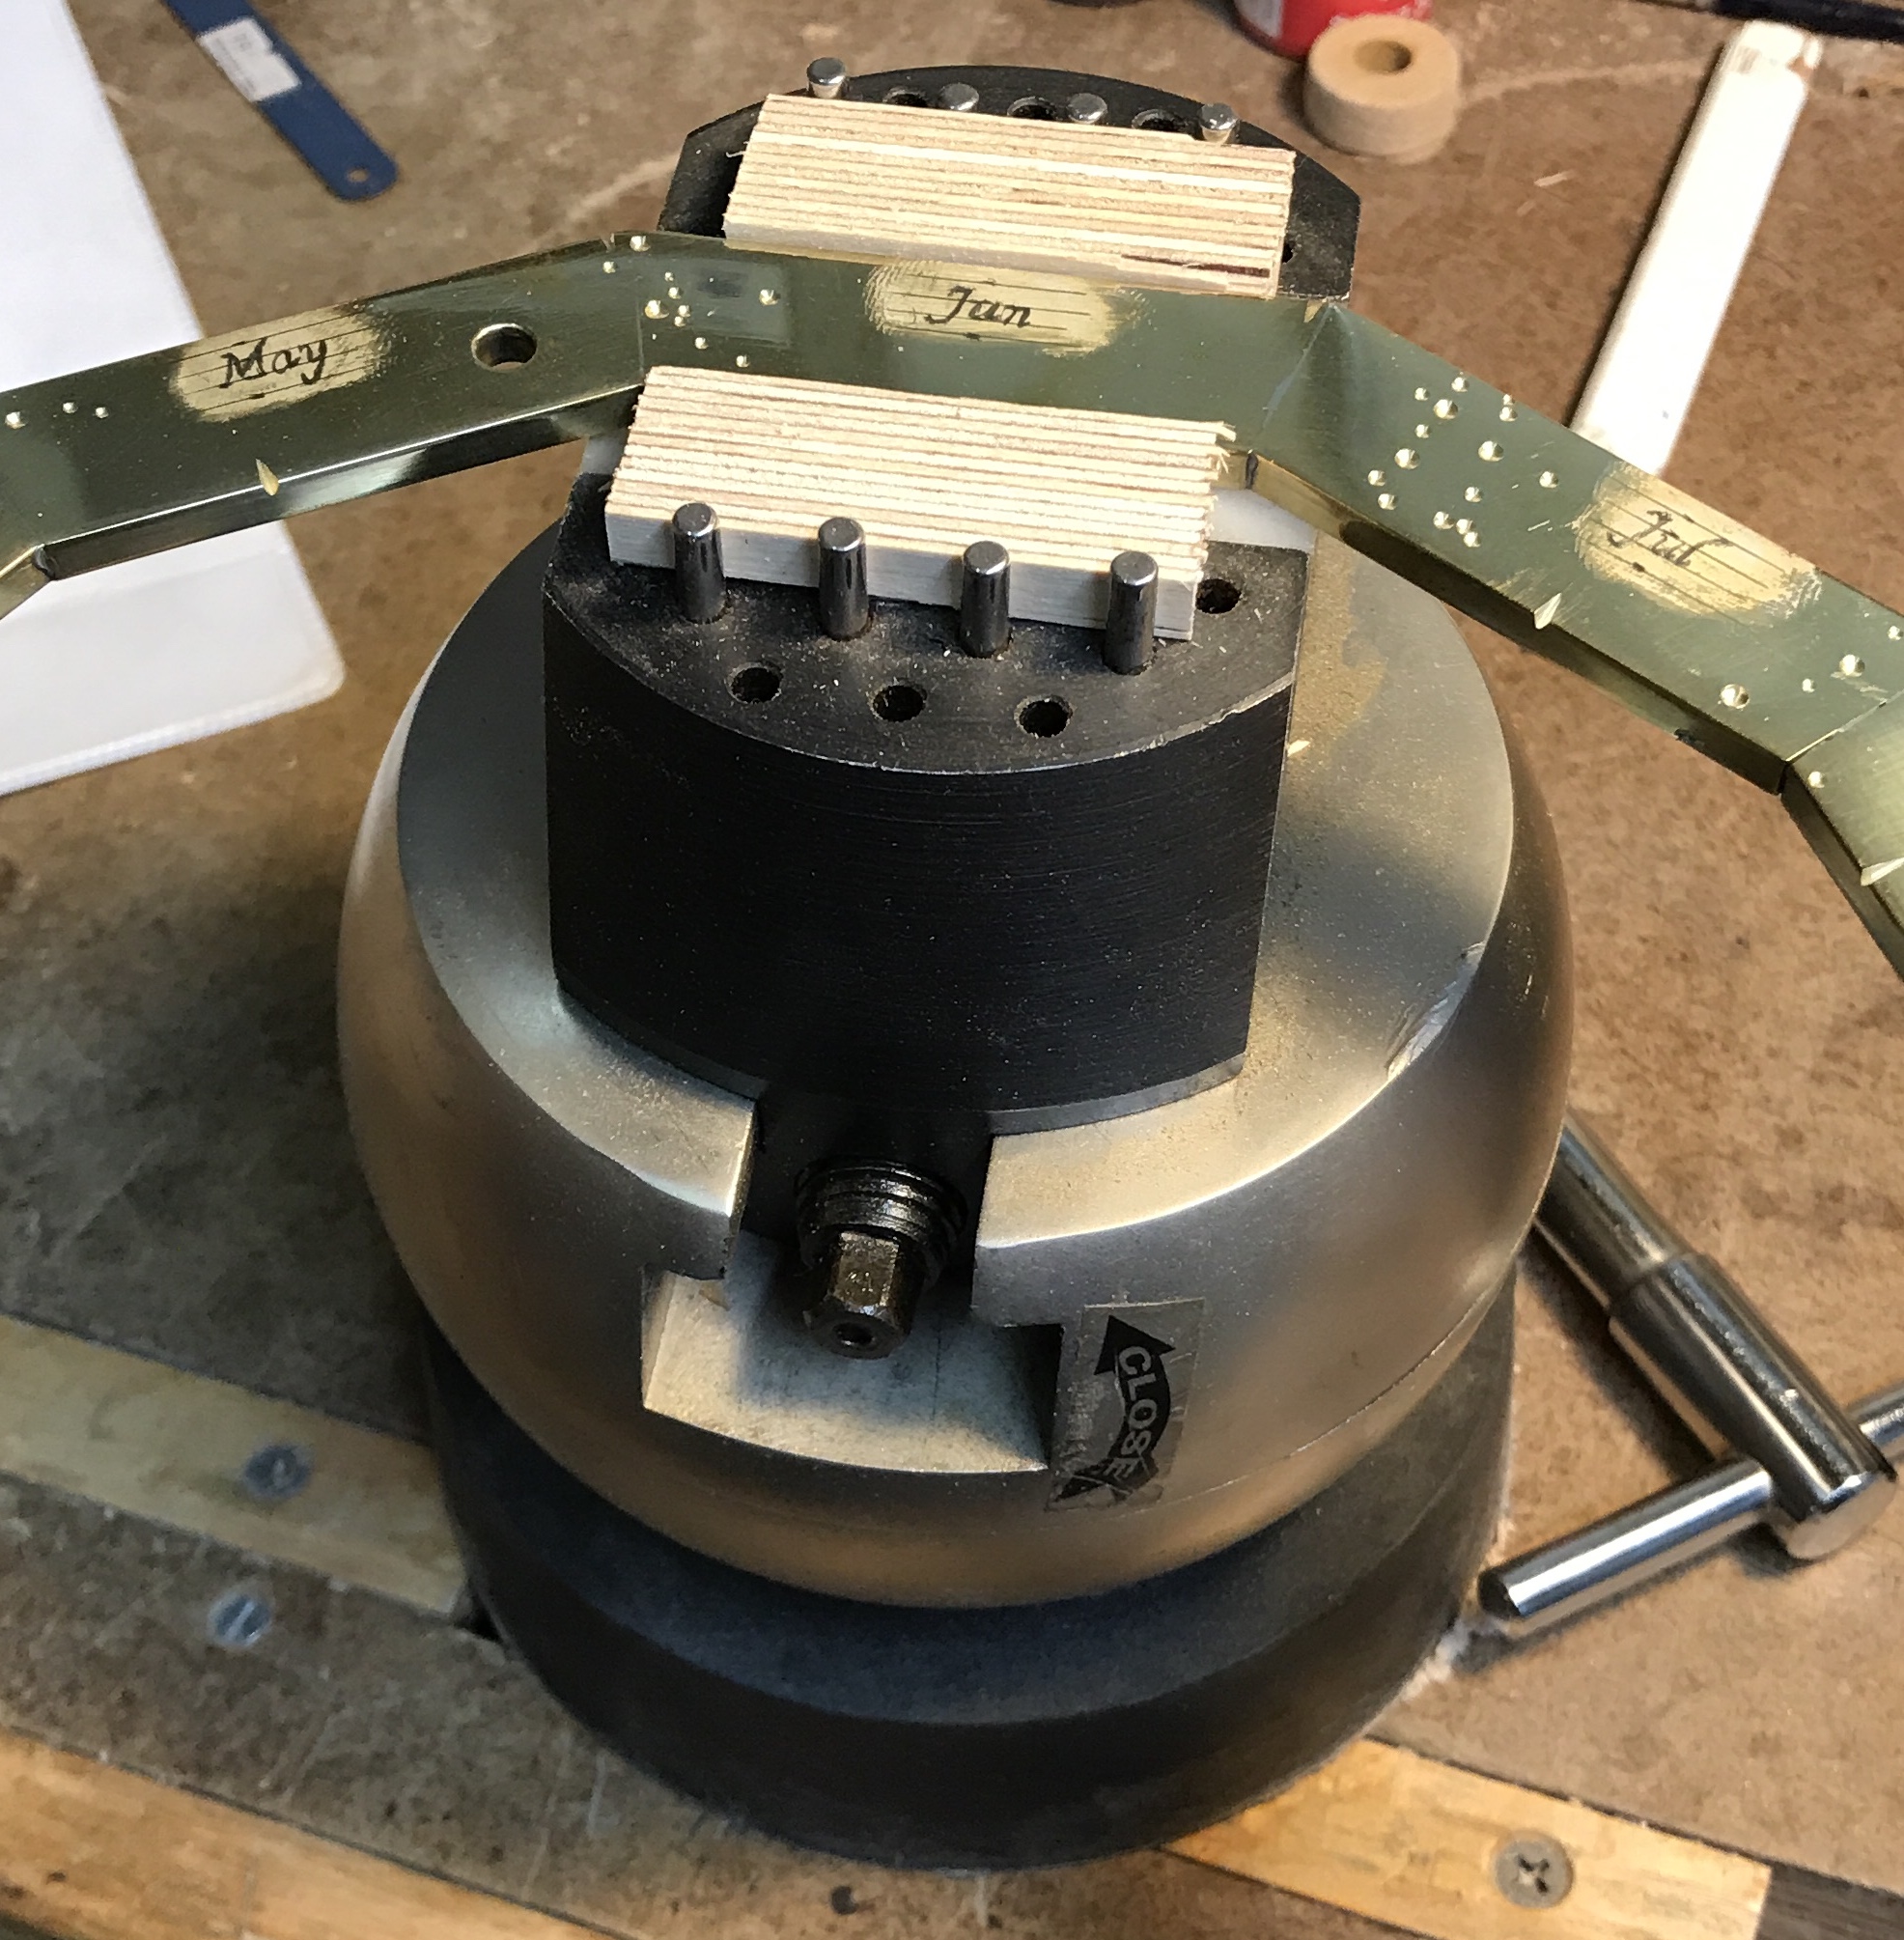
The graver was sharpened on the 2000 grit diamond stone. For some reason the angles were off and new faces were cut on all three sides of the point! Not sure why, but the graver was very sharp. Clamped the dodecagon in the vise as seen in the following picture and proceeded to engrave the month abbreviations. The result was pretty much as expected for the lack of practice. Seemed to mostly have difficulty with cutting too deep. This may have been a result of the wooden blocks in the vise being a little thicker than the brass so the angle of the graver could not be lowered sufficiently.
The astronomical symbols were layed out similarly to the month abbreviations. A bottom line was marked 3/32" from the inside of the dodecagon to the side of each constellation. The top line was drawn 3/16" above the bottom line. The symbols, as seen in the overview, were sketched between the lines. Finally, they were engraved and came out better looking than the letters. They are simpler than letters and I was better prepared for the depth of cut.
Though not particularly happy with the engraved months I decided to proceed. The brass needed to be polished and protected. The brass was polished after a minimal sanding with 320 to 1000 grit paper. It was then washed with soap and water. Gloves were worn during all of these processes. Finally the dodecagon was hung from a paper clip in a cardboard box and spray painted with clear lacquer. There were a lot of bubbles in the finish!
Frustration with the poor paint job and the not so nice engraving caused thoughts to turn to etching. A video from MyMechanic showed how nice engraved brass could look, so it was time to do some experiments in etching. A number of items were needed. First silicone paper was purchased (Avery Fabric Transfers). These use heat (from an iron) to transfer the ink from paper to substrate. Second was FeCl3 solution as etchant. This is normally used for etching circuit boards and was purchased from Frye's. The third purchase was fingernail polish (Essence Gel Polish). This was used in the video to fill in the etched numbers.
The paper was more expensive than expected so in order to maximize its value I plan to print a page full of potential transfers. All of the letters or other art work needs to be printed backwards as well as inverted, black for white. The reverse image when transferred to the brass will be correct left to right and the black ink will surround the white letters, which will be exposed to the etchant. I am going to first experiment with the Charm font and size seen above. I will also print out the constellations.